Dr. Tyrel (Tink) Moore
I was very sad to learn yesterday that UNCC lost a great professor in 2020. I had hoped to connect with him this year for my thesis but sadly I will be limited to his published research.

I first met Tink in 1994, fresh from home with my accent still so prominent that I was often misunderstood. I was enrolled in his undergraduate world geography class which was a large lecture hall style class. Tink was great at engaging such a large group of students and quickly learned faces and names regularly calling on individuals to answer, respond and engage with him.
He pointed at me sometime around the third week of class and turned to write on the board as I responded. I saw his hand stop moving, his elbow dropping as he tilted his head to listen. When I finished he spun completely around on the hill of his cowboy boot, pointed directly at me with his chalky finger and said, "See me after class!" I spent the rest of the class wondering if I had made some sort of misstep or blunder.
Instead, the first words out of his mouth were, "Where are you from?" I can still see his crooked grin and twinkling eyes. Turns out he was from KY and grew up in the same area that my grandmother did. He regularly spoke with me about my family and our story and was very interested in the fact that I was the first student from Graham county to attend UNCC - it was the last county represented. Toward the end of the semester he invited me to take one of his 4000 level classes focused specifically on Appalachia.
The first day of class he passed out a blank US map and simply said draw Appalachia. He knew exactly what he was doing and I think got a big kick out of what happened next. I took my pencil and drew a small circle around the western tip of NC and north GA crossing the border into TN and just barely nicking the bottom of KY and put my pencil down. Everyone was still working and I realized that these were Geography students and they were meticulously drawing the entire Appalachian mountain range.
Without a word Tink collected the pages and pinned them all up to the cork band above the board. Mine was front and center. He couldn't hide his smile though when he asked, "What just happened?" It was the beginning of a great class. Another entire portion of the class was focused on migration patterns (this was decades before Hillbilly Elegy) and I realized my family's story was a perfect example of alternating generational migration patterns.
I was young and not yet used to the kind of academic reading required in upper level classes. I wish I had a better recollection of some of the other things we read and discussed - or a copy of his syllabus to work from - but he left a nice collection of articles for me to read.
It's not the same though - I was really hoping to hear that laugh again.
Tool Specificity and project success

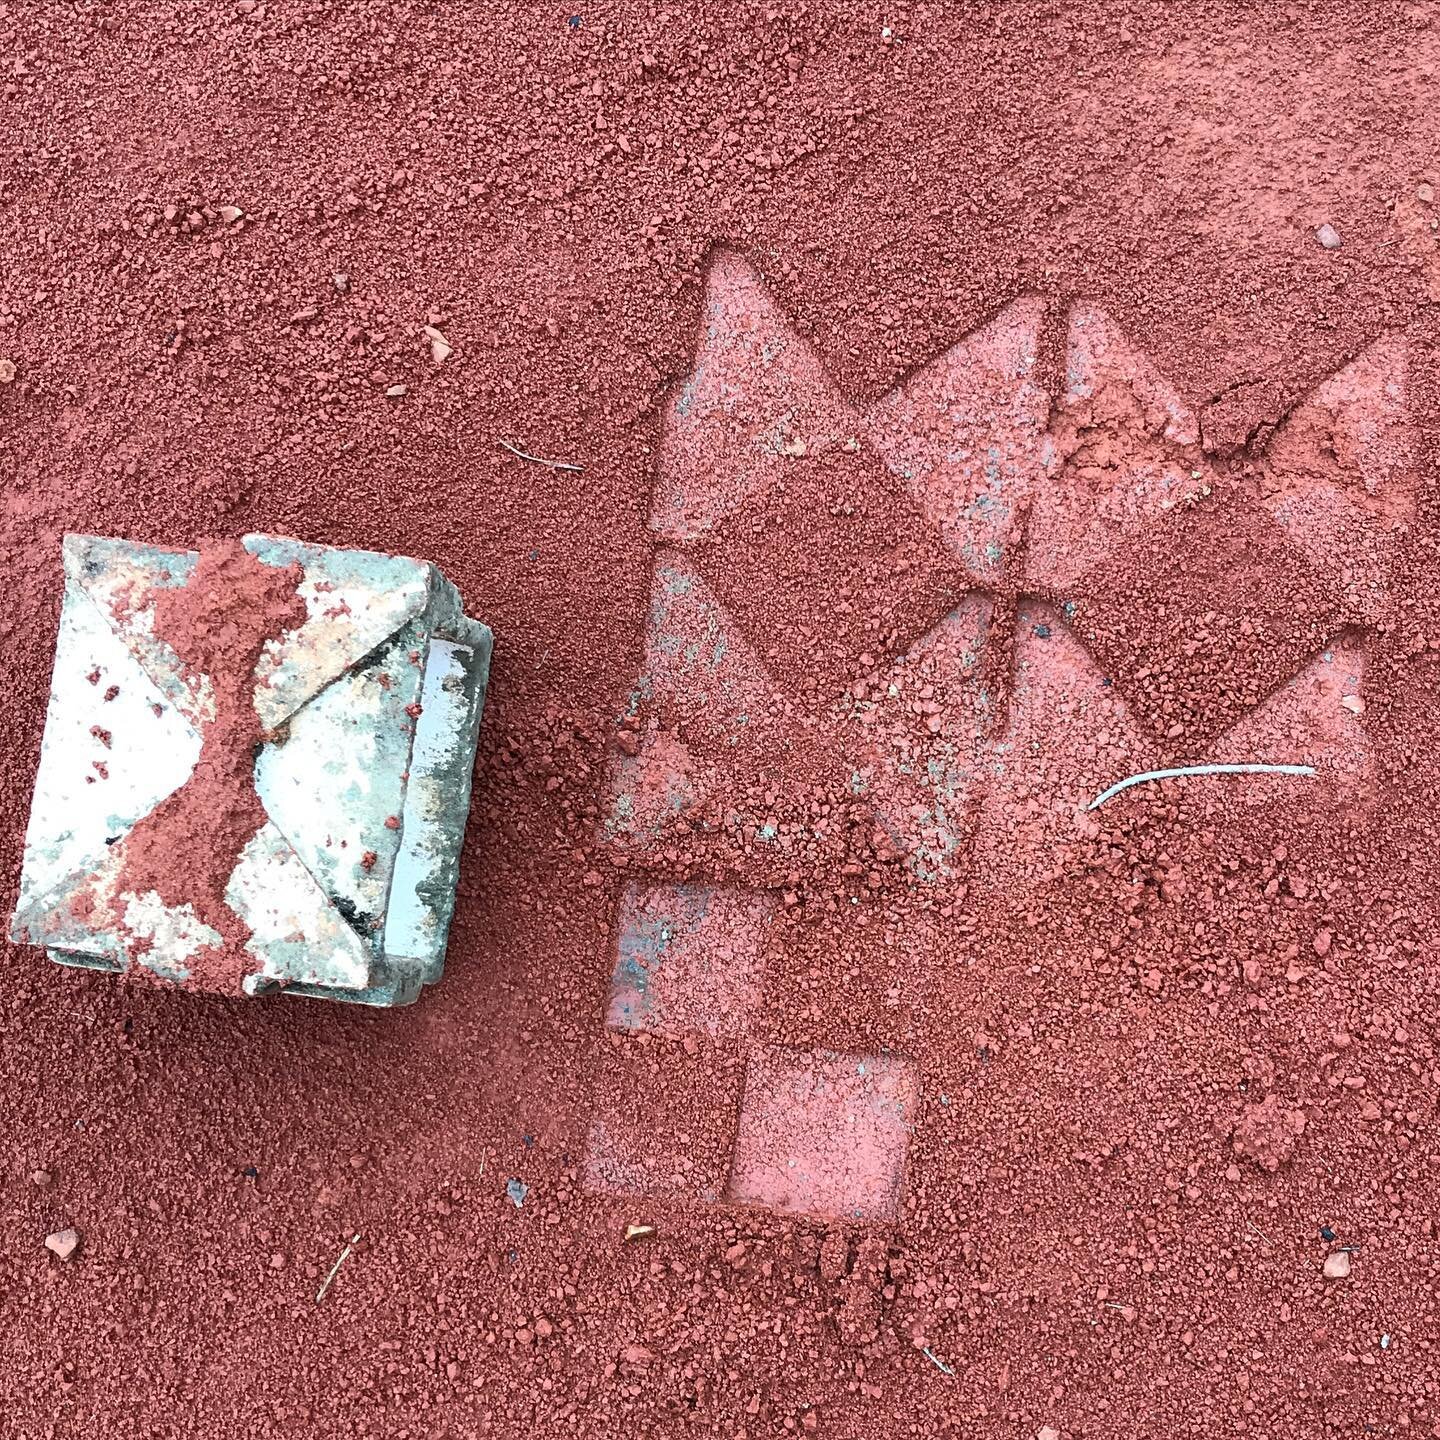
Sometimes when tasked with what should be a simple job we find ourselves taking elaborate and convoluted detours as we must reroute our work to accommodate the lack of tools designed for very specific purposes. My simple bisque stamp for my Mud Quilt project is no exception. My prototype is a prototype not because I needed to work out how to approach the project but rather because I was not able to construct the piece to my liking with the tools that I had at hand.
As you can see below I am making a cube with each of the six sides featuring a common arrangement of basic shapes that are used to form many quilt patterns. The tool that I needed was a slab cutter that could precisely cut 45° angles on my square slabs so that they fit together precisely and formed a strong edge that can withstand the pressure of being pressed into the mud.

I could have ordered the tool delaying my project, but fortunately we have a 3D printer and the skills to design simple objects like this one. An hour and a half after hitting print I was able to string up this simple little tool and cut perfectly beveled clay edges. It works so beautifully that I’ve printed several for each of the ceramic studios so that other student’s slab building can benefit from beautifully beveled edges.

Hand Painted Silkscreen Transparencies
This week I began my silkscreen printing journey. I am drawn to the mode of printmaking for my thesis because the form itself uses layers to express forms. The idea of layering fits nicely into my ideas about the generational patterns of land use. The patterns of our history are physically layered on the landscape.
I thought that when I began these pieces I would begin by working with the same photographs and digital textures that I am using to create the digital collages in my Faces and Places series. But at the urging of and with the encouragement of Maja to bring the work of my hand to these pieces I decided that I would attempt to make a print by painting directly on the transparency with an India ink.
I know that much of my work can tend to be too tight so I intentionally chose to work on top of an unfinished sketch as a reference and I tried to keep my brushwork loose and not try and make each color field match precisely. Below are two of the three transparencies that I have painted so far:

Today I was able to gain access to the print studio and burn my first screen and pull my first print. Below is the result on newsprint:

I have to reburn this screen because I did not leave enough room at the bottom to contain the ink from flooding and printing on the screen. That’s okay because I’ll remember to plan for this on all of my other screens. I had in my mind as I worked with this piece the Asian inspired prints of the Impressionists. I plan to go back and review the prints of Mary Cassatt - my linework is much heavier than hers.
As I planned the composition I was trying to create shapes/voids that would leave openings for me to play with textures and materials and explore that idea of layering. At home in the evening away from the studio I decided to scan these transparencies and create another digital collage using a similar process to my other pieces. You can see the result below and read more about this piece on my Faces and Places project page.
The one advantage of this digital process was that I was able to clean up a couple of smears of ink and also correct the brow line which I felt was much too heavy. Here is my first iteration of this composition:

Nomadland and the Visualization of Loss
I just finished watching the film Nomadland filmed under the direction of Chloe Zhao. (I want to watch her other films and read the book by Jessica Bruder.)
I watched the film a day after listening to a talk by photographer Daniel Kariko. Tthe germ of much of Kariko’s work seems to be an attempt to examine his own sense of loss and placelessness as he lives in a world in which his native country Yugoslavia no longer exists. He has recently begun a body of work documenting the life of the Balkan diaspora titled Days of Summer Past. There were so many echoes of his family and community’s experience in my own family’s and community’s experience in Appalachia. Those generational migration patterns and ‘being of two places’ is something that I want to explore more – I will need to face a rereading of Hannah Coulter at some point in order to begin that exploration.
But it was his project Speculation World through which he documented the Florida real estate crisis following the 2008 recession that came to my mind as I watched the film.
Kariko’s work encompasses same time period as Nomadland. Looking at his photographs of skeletal neighborhoods with empty lots gave my mind a visual and architectural context for the setting of Nomadland. The film portrays the loss of place through the life of the main character Fern (Frances McDormand) . The main triggering event of the film is the closing of the US Gypsum operation resulting in the disappearance of an entire zip code in Empire, Nevada. USG closed because there was a drastic reduction in the demand for sheetrock that is so nakedly documented in Kariko’s photographs:

Two for Two, Daniel Kariko, 2009
I have been thinking about how it has taken more than a decade for those events to make their way into our mainstream visual storytelling devices. We cannot fathom the full impact of loss without perspective. My viewing of Nomadland also serves as a reminder that we view everything through context. My viewing of this film would have been a completely different experience two days ago.
Reflections on Mud Quilts
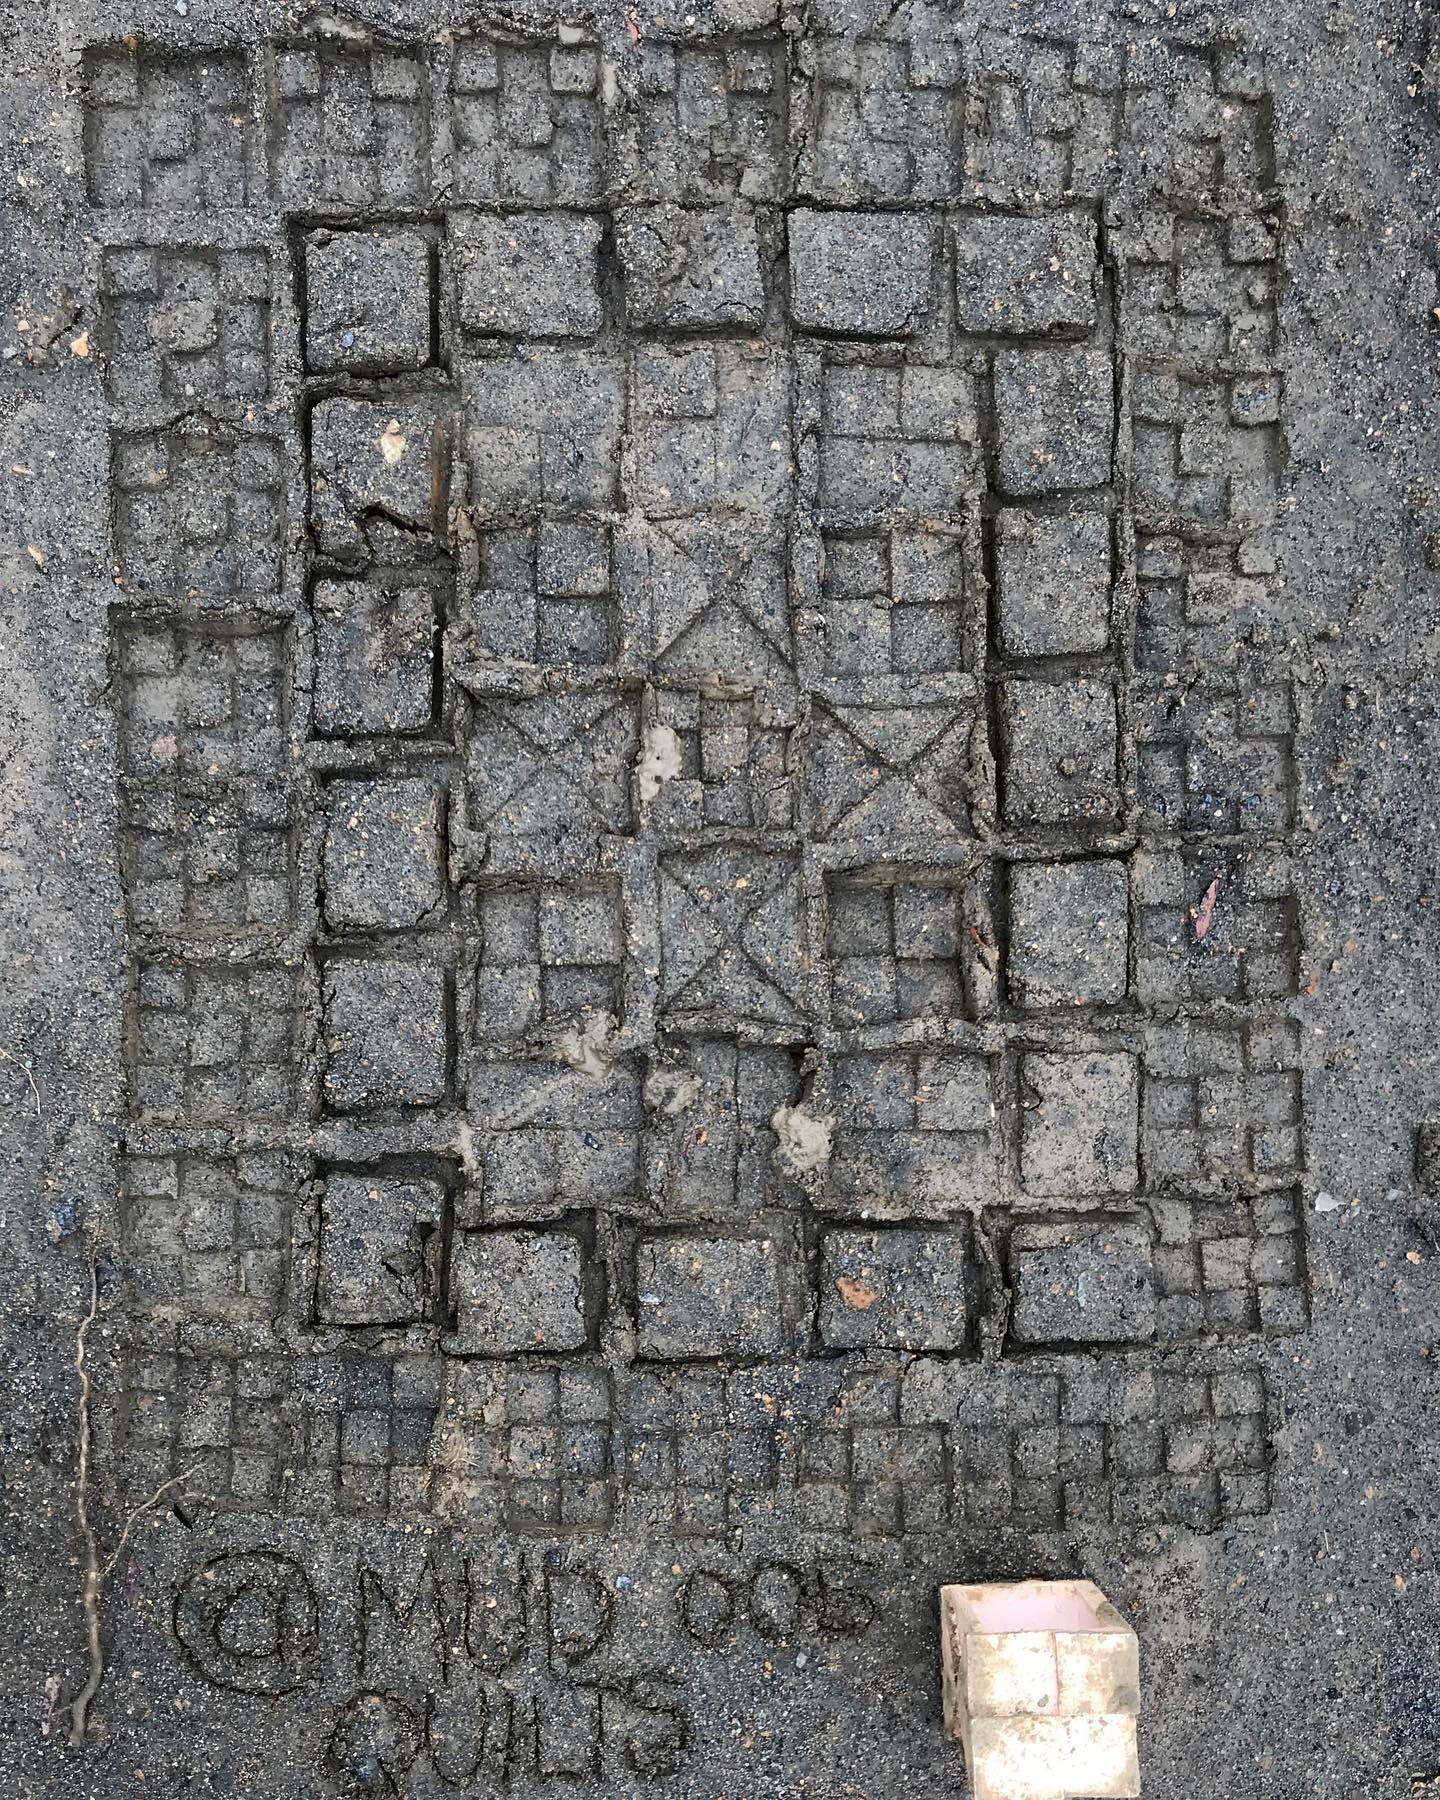
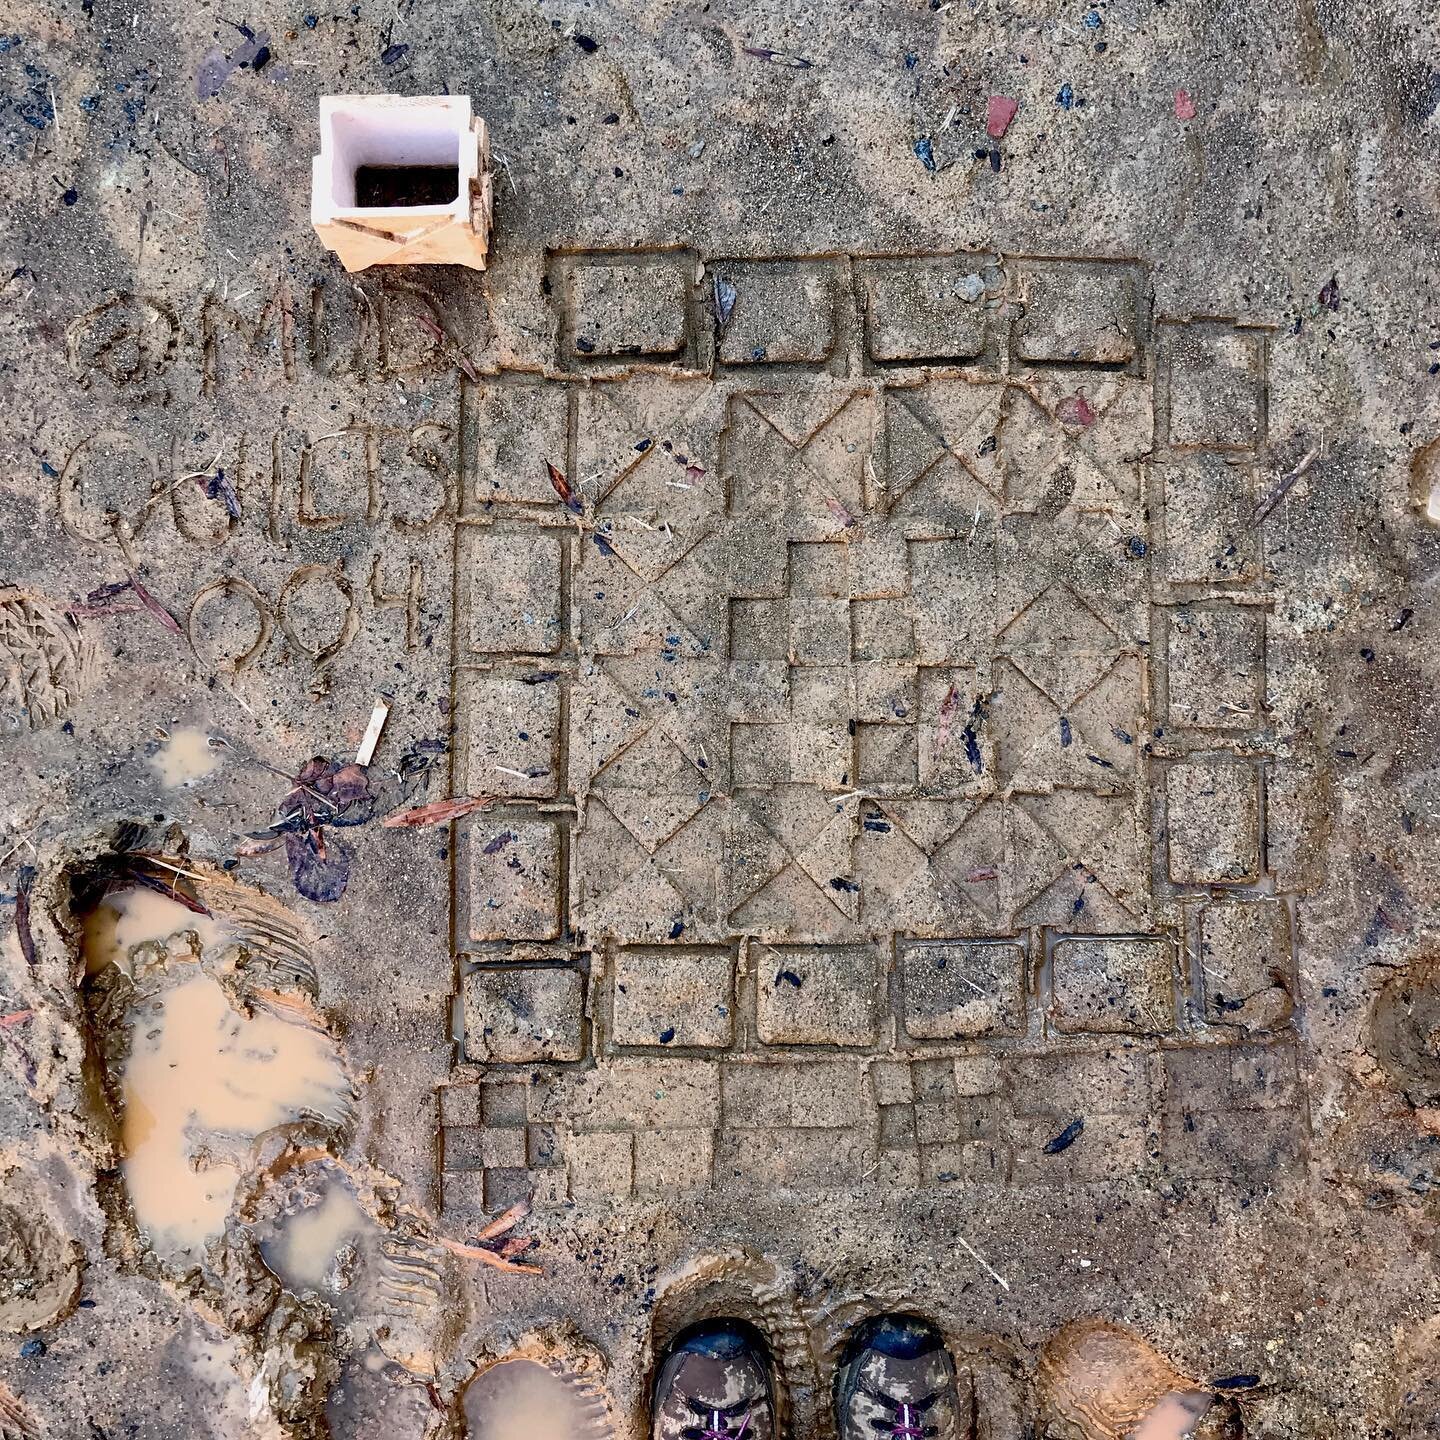
This body of work that I have begun is little more than a sort of scratching or mark making in the dirt not unlike that work we did as children. This native clay accepts my thoughts and intentions, my rhythm, my pattern making, my timidity and holds their form as a memory for a while. These are not stable works as they are susceptible to traffic, construction, and the elements just to name a few vulnerabilities.
I was able to revisit Impression 003 three days after it was made to document changes in the piece. The clay at the site had a drastic change in color becoming lighter as it dried. The shapes made by the compression of my stamp retained more moisture and were darker in appearance giving the piece a heightened contrast. My lettering which was hardly discernable at all when I created it could be clearly read.

You can see in the cracked and drying clay around the quilt that my work brought stability to the earth at this construction site. The piece survived for many days; even after several rains it was still partially visible.
Since this impression I have been working on a bisque stamp with which I hope to make larger and more quilt-like impressions. The prototype is in the kiln as I write. Below you can see a couple of photographs of the stamp in progress:


Thinking About Layers
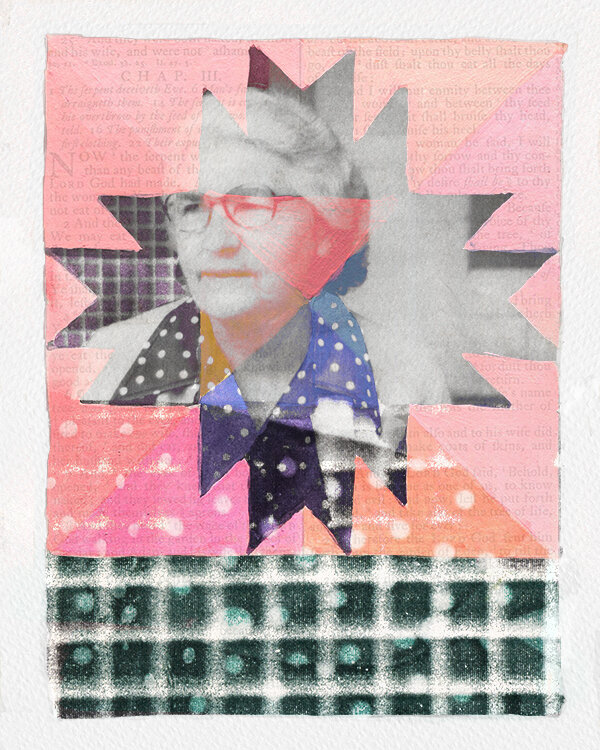
I think that I have finished Goin’ Visitin’ (you can read the accompanying description on the projects page). I’m really trying to push my Ps skills in these pieces. I’m also trying to fully explore this idea of a geobiography. How can you represent it visually?

I pulled into this portrait many references that anyone who knew Virgie well as well as faint references to the Stecoah Township in the 1980s. Stecoah has always had such a strong community identity. I’ve been thinking about why that might have been and how I might express those in words. But it has something to do with layers. Stories and memories layered overtop of landmarks, trails and fields. Walking the same worn path from the back porch to the garden or down to the spring that had been used for years. Life was lived in layers.
Virgie was one of the brighter personalities and was known far and wide - you can see it in her expression, right?
You might also be able to tell if you look closely that I landed on included the book of Ruth as the text layer in this piece. I chose this portion because Virgie left home at the age of fifteen to marry a much older man. There were just echoes there that I wanted to capture.
Compositionally there were some challenges in the way the images were divided. The quilt square creates such a distinct line. Initially I brought in the grid of the screen porch scaled up to fill in that space and then a layer of the polka dotted shirt large over top of that. The blend layers created some interesting coloring choices in her shirt that I liked and decided to keep but they were isolated in the center of the canvas. I attempted to bring in those colors in the grid section to tie the two sections of the piece together and move the eye around a bit. I think it works - I’ll know better when I return to look at it again in a few days.
Amos Kennedy - Proceed and Be Bold

"Amos Kennedy Jr." by Virginia Humanities is licensed under CC BY-NC-ND 2.0
This week’s book arts resources included a video about letter press printmaker Amos Kennedy - Proceed and Be Bold! Amos is an interesting character. The documentary talks a bit about the rise in letter press work in general - Hatch out of Nashville has a cameo appearance. Hatch is on my places to visit.
I really enjoyed Amos’s sense of humor and frankness. His Nappy Gram project was awesome - as was his response to being questioned by the police department regarding one of his affirmative action post cards. There is a section of the film that addresses him calling himself ‘negro’ that is very informative and challenging. I respect how he confronts things head on and uses racially charged icons and stereotypes. It seems as if he’s saying our problems aren’t going to go away if we just clean up our language and iconography and ‘make nice’.
The most interesting part of the film for me was when Amos was discussing the passing away of the southern rural African American way of life. It is a rich culture that we don’t seem to pay very much attention to.
Below is the link to Proceed and Be Bold! I highly recommend it.

ARTF 3351 Book Arts
This semester I am enrolled in a book arts and mixed media course. We just completed our first assignment which was to design and bind a sketchbook to be used in our coursework.

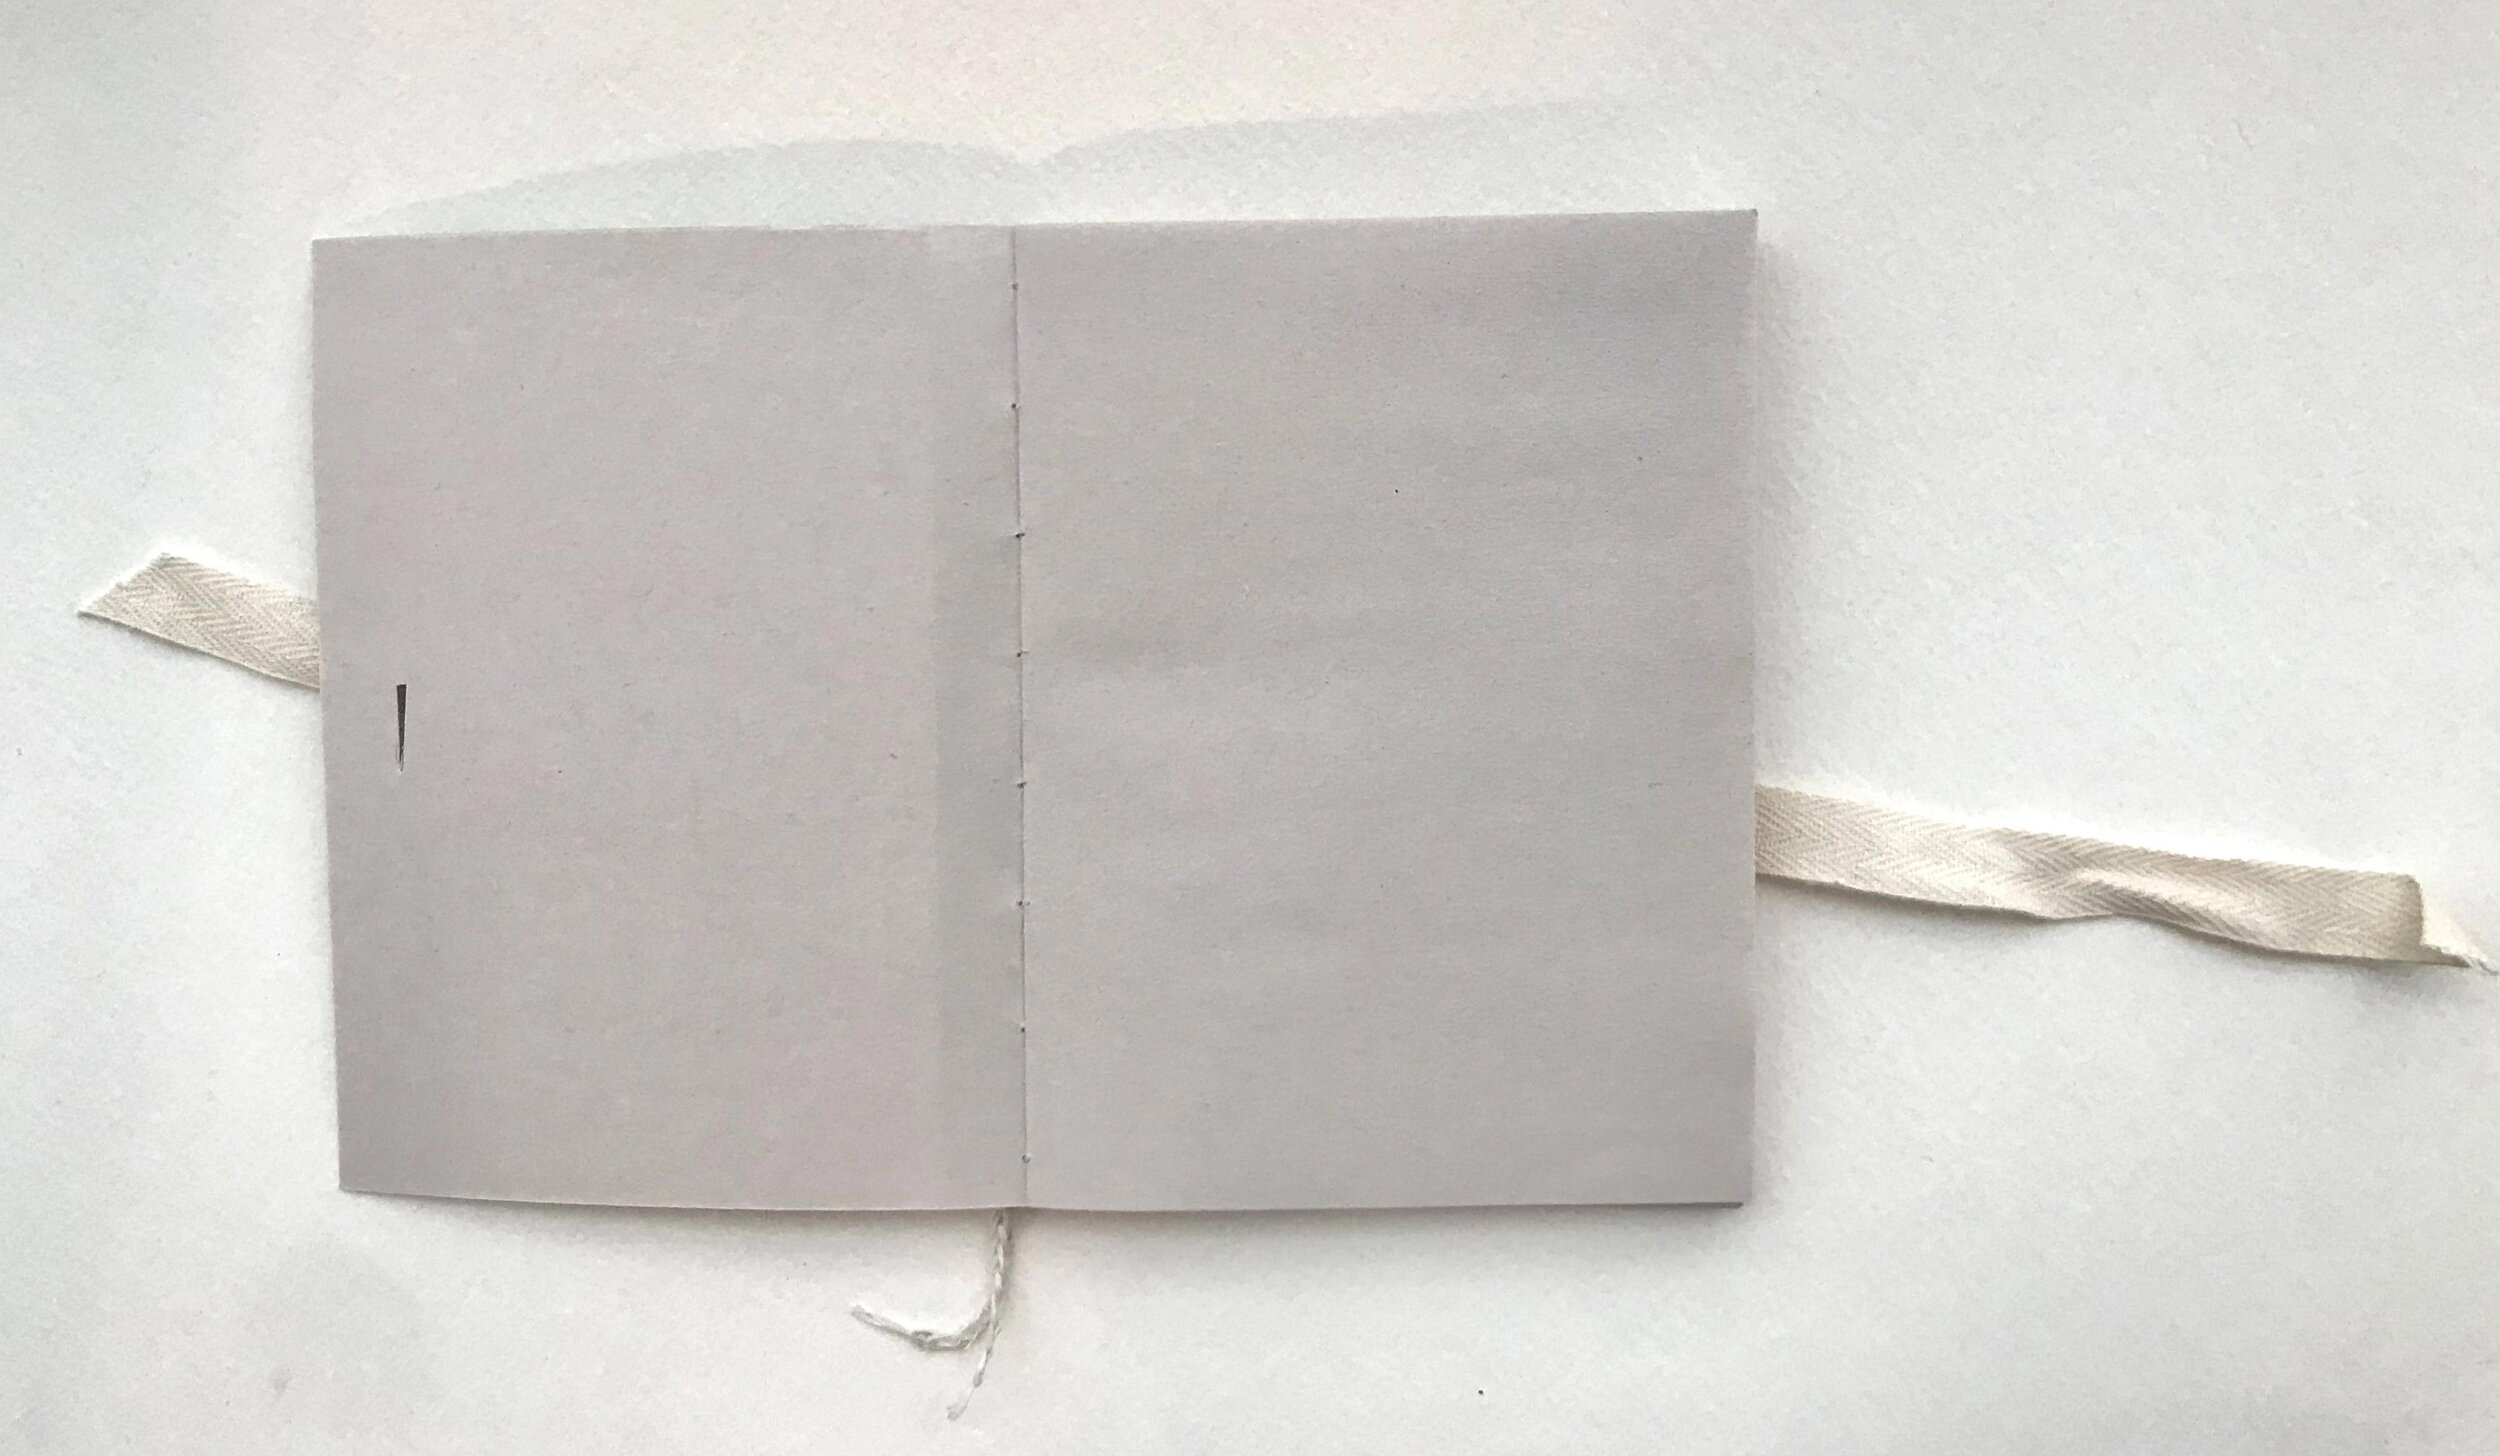
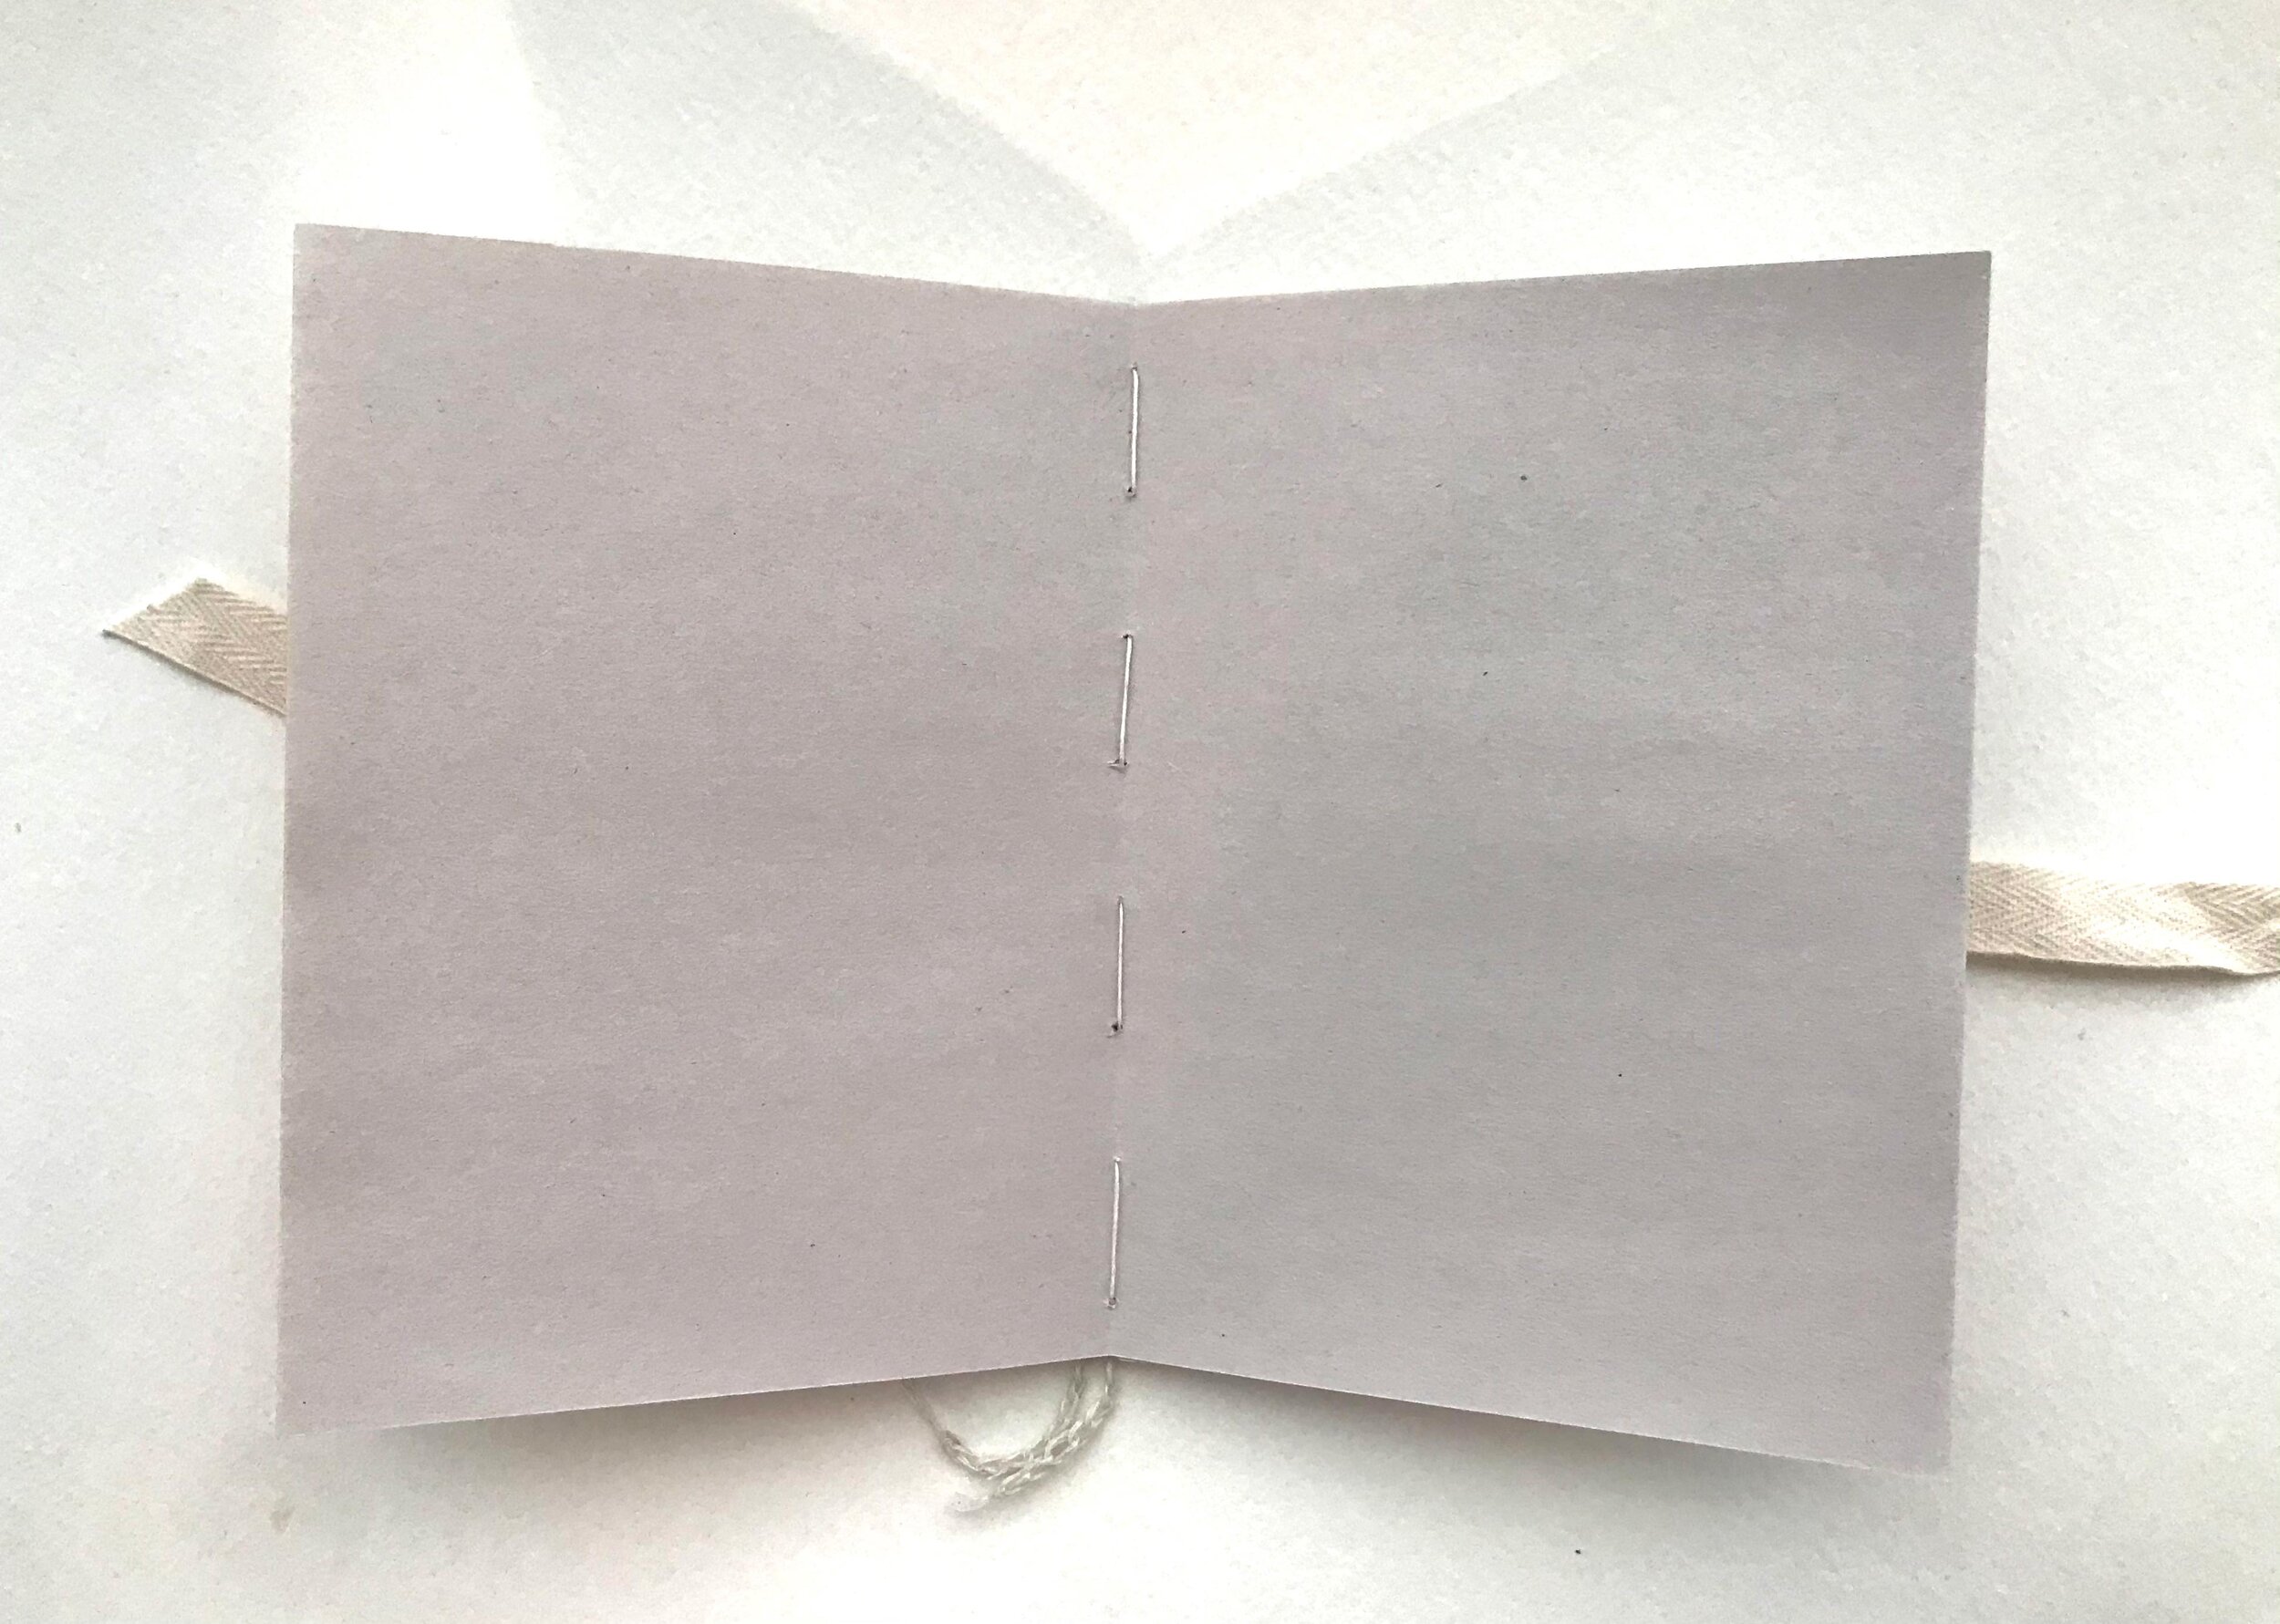
Before sewing together my final project I practiced the French link and kettle stitches on this little watercolor dummy. The cover is a hand painted scrap left over from a fabric design project. I found this YouTube video demonstration of the stitches very helpful: French Link Stitch by Sea Lemon.
My professor’s advice, “Don’t be a dummy, make a dummy” proved to be very good advice!
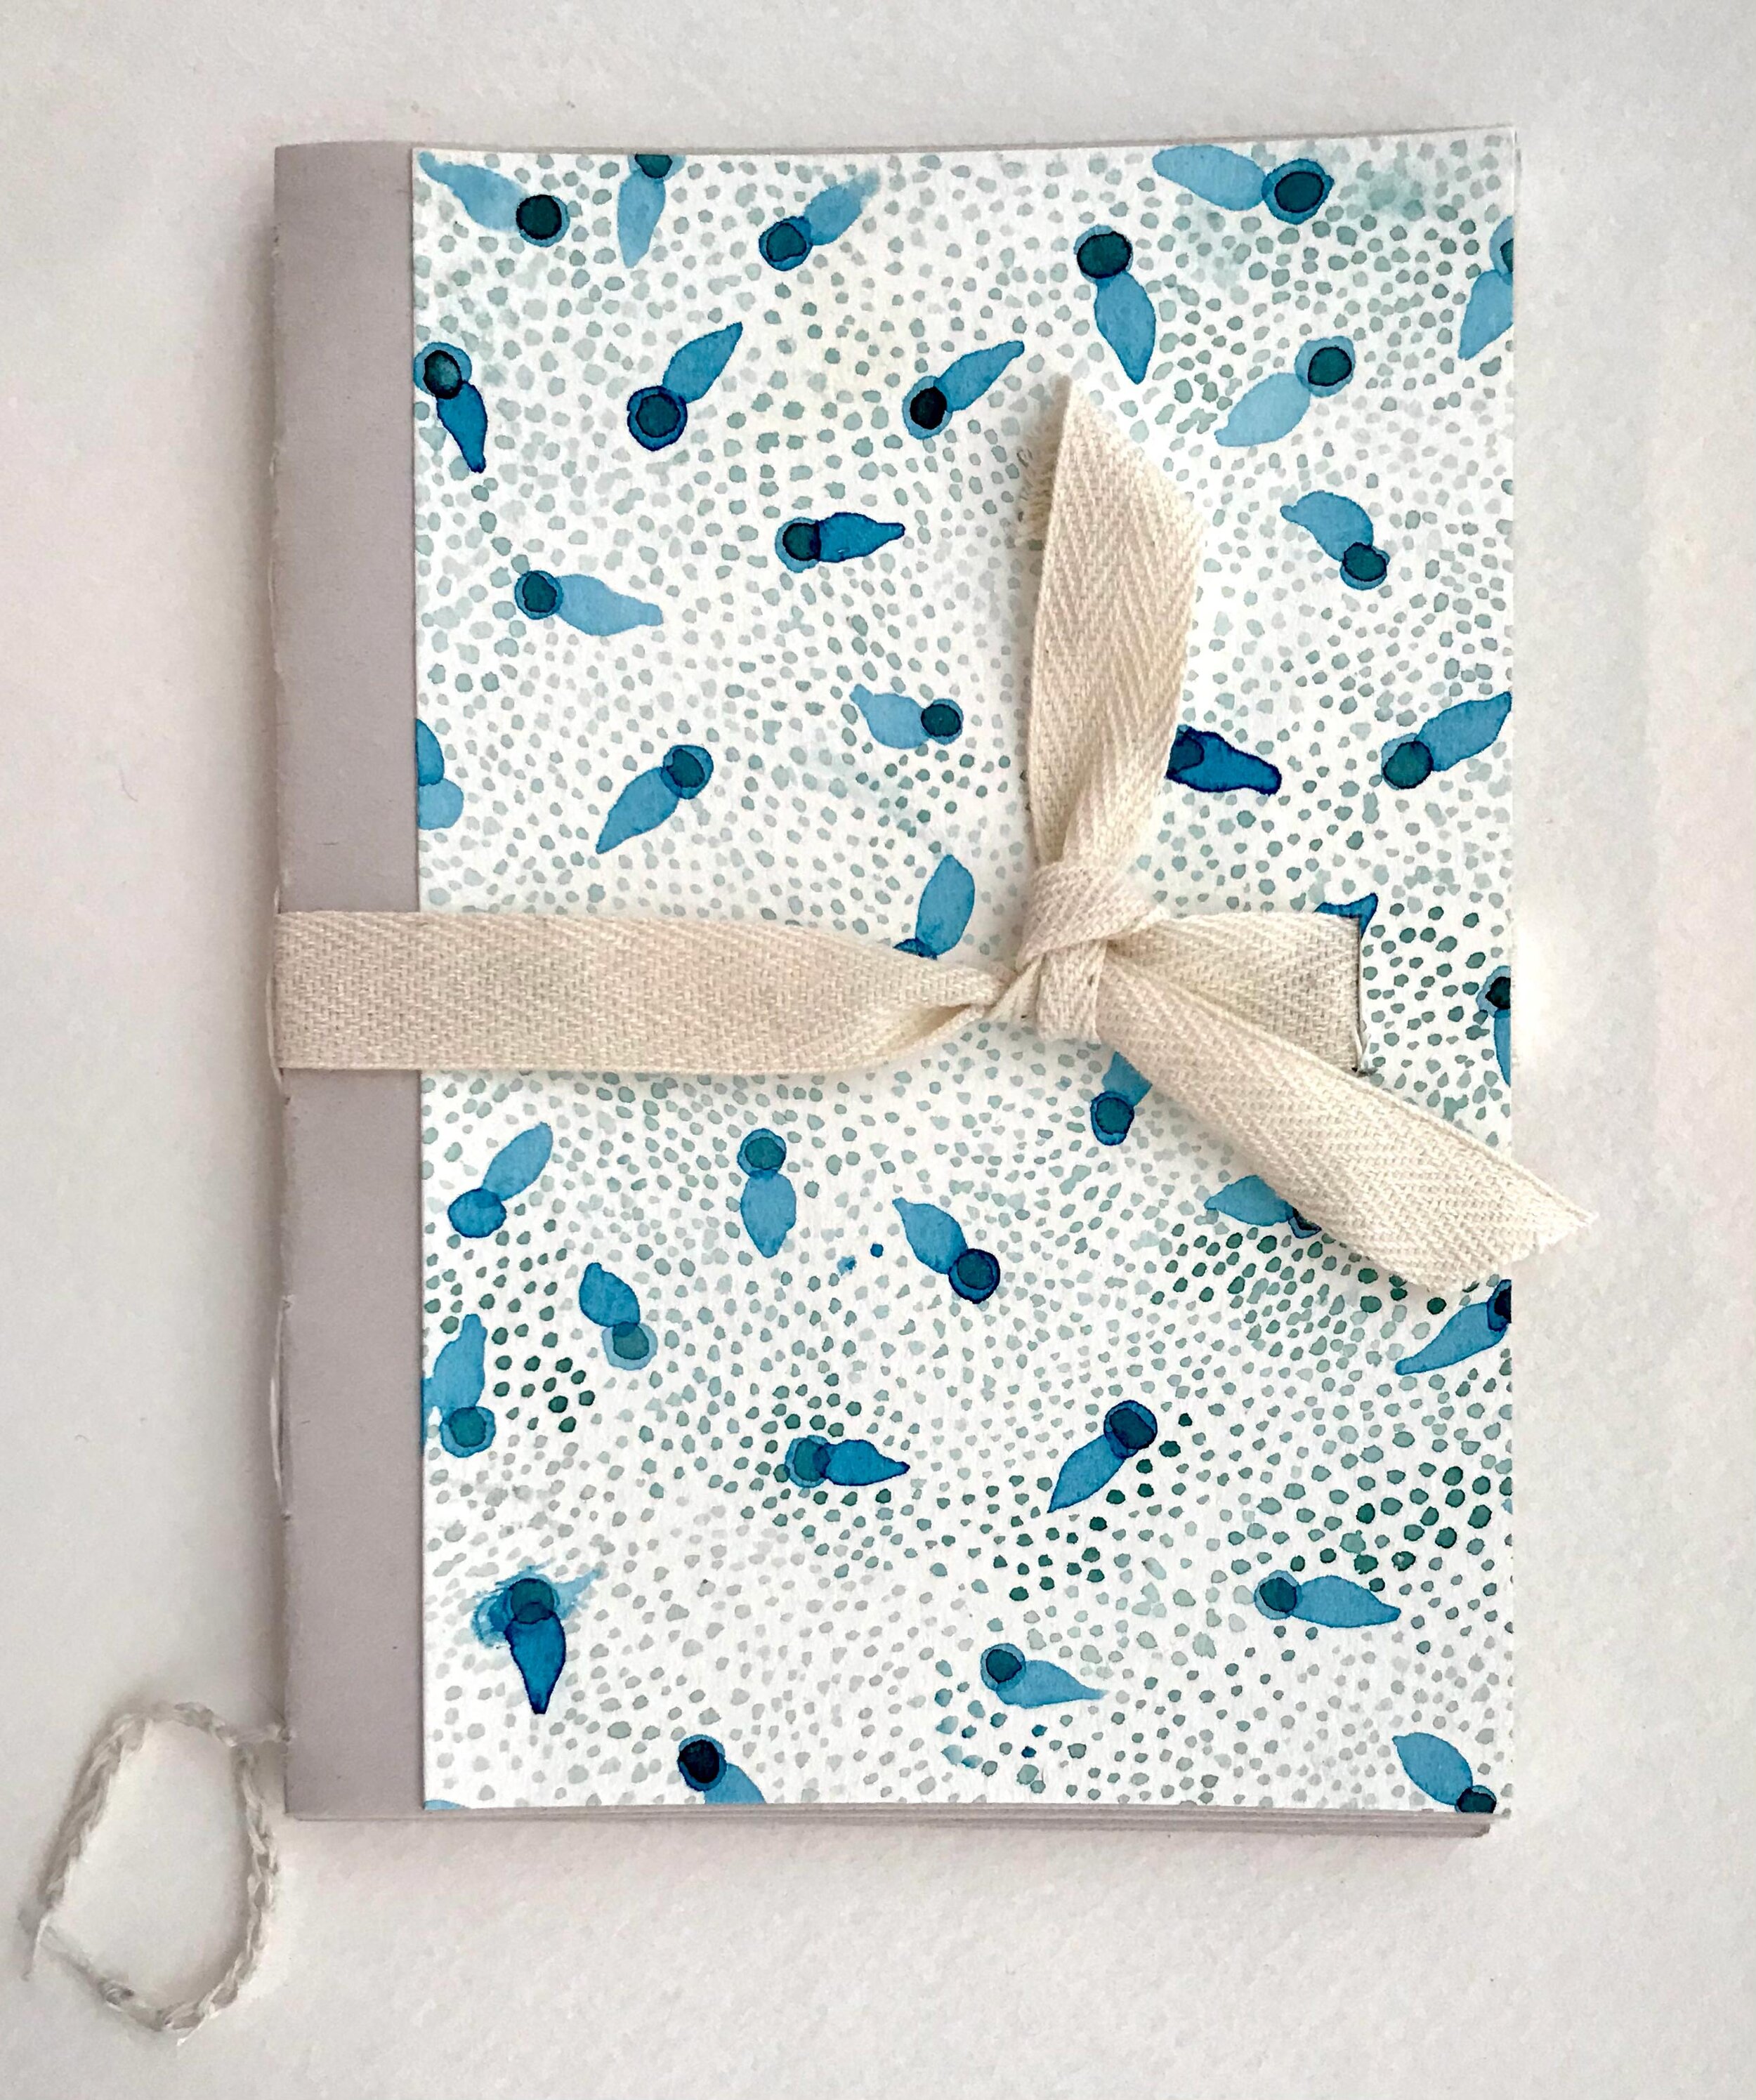

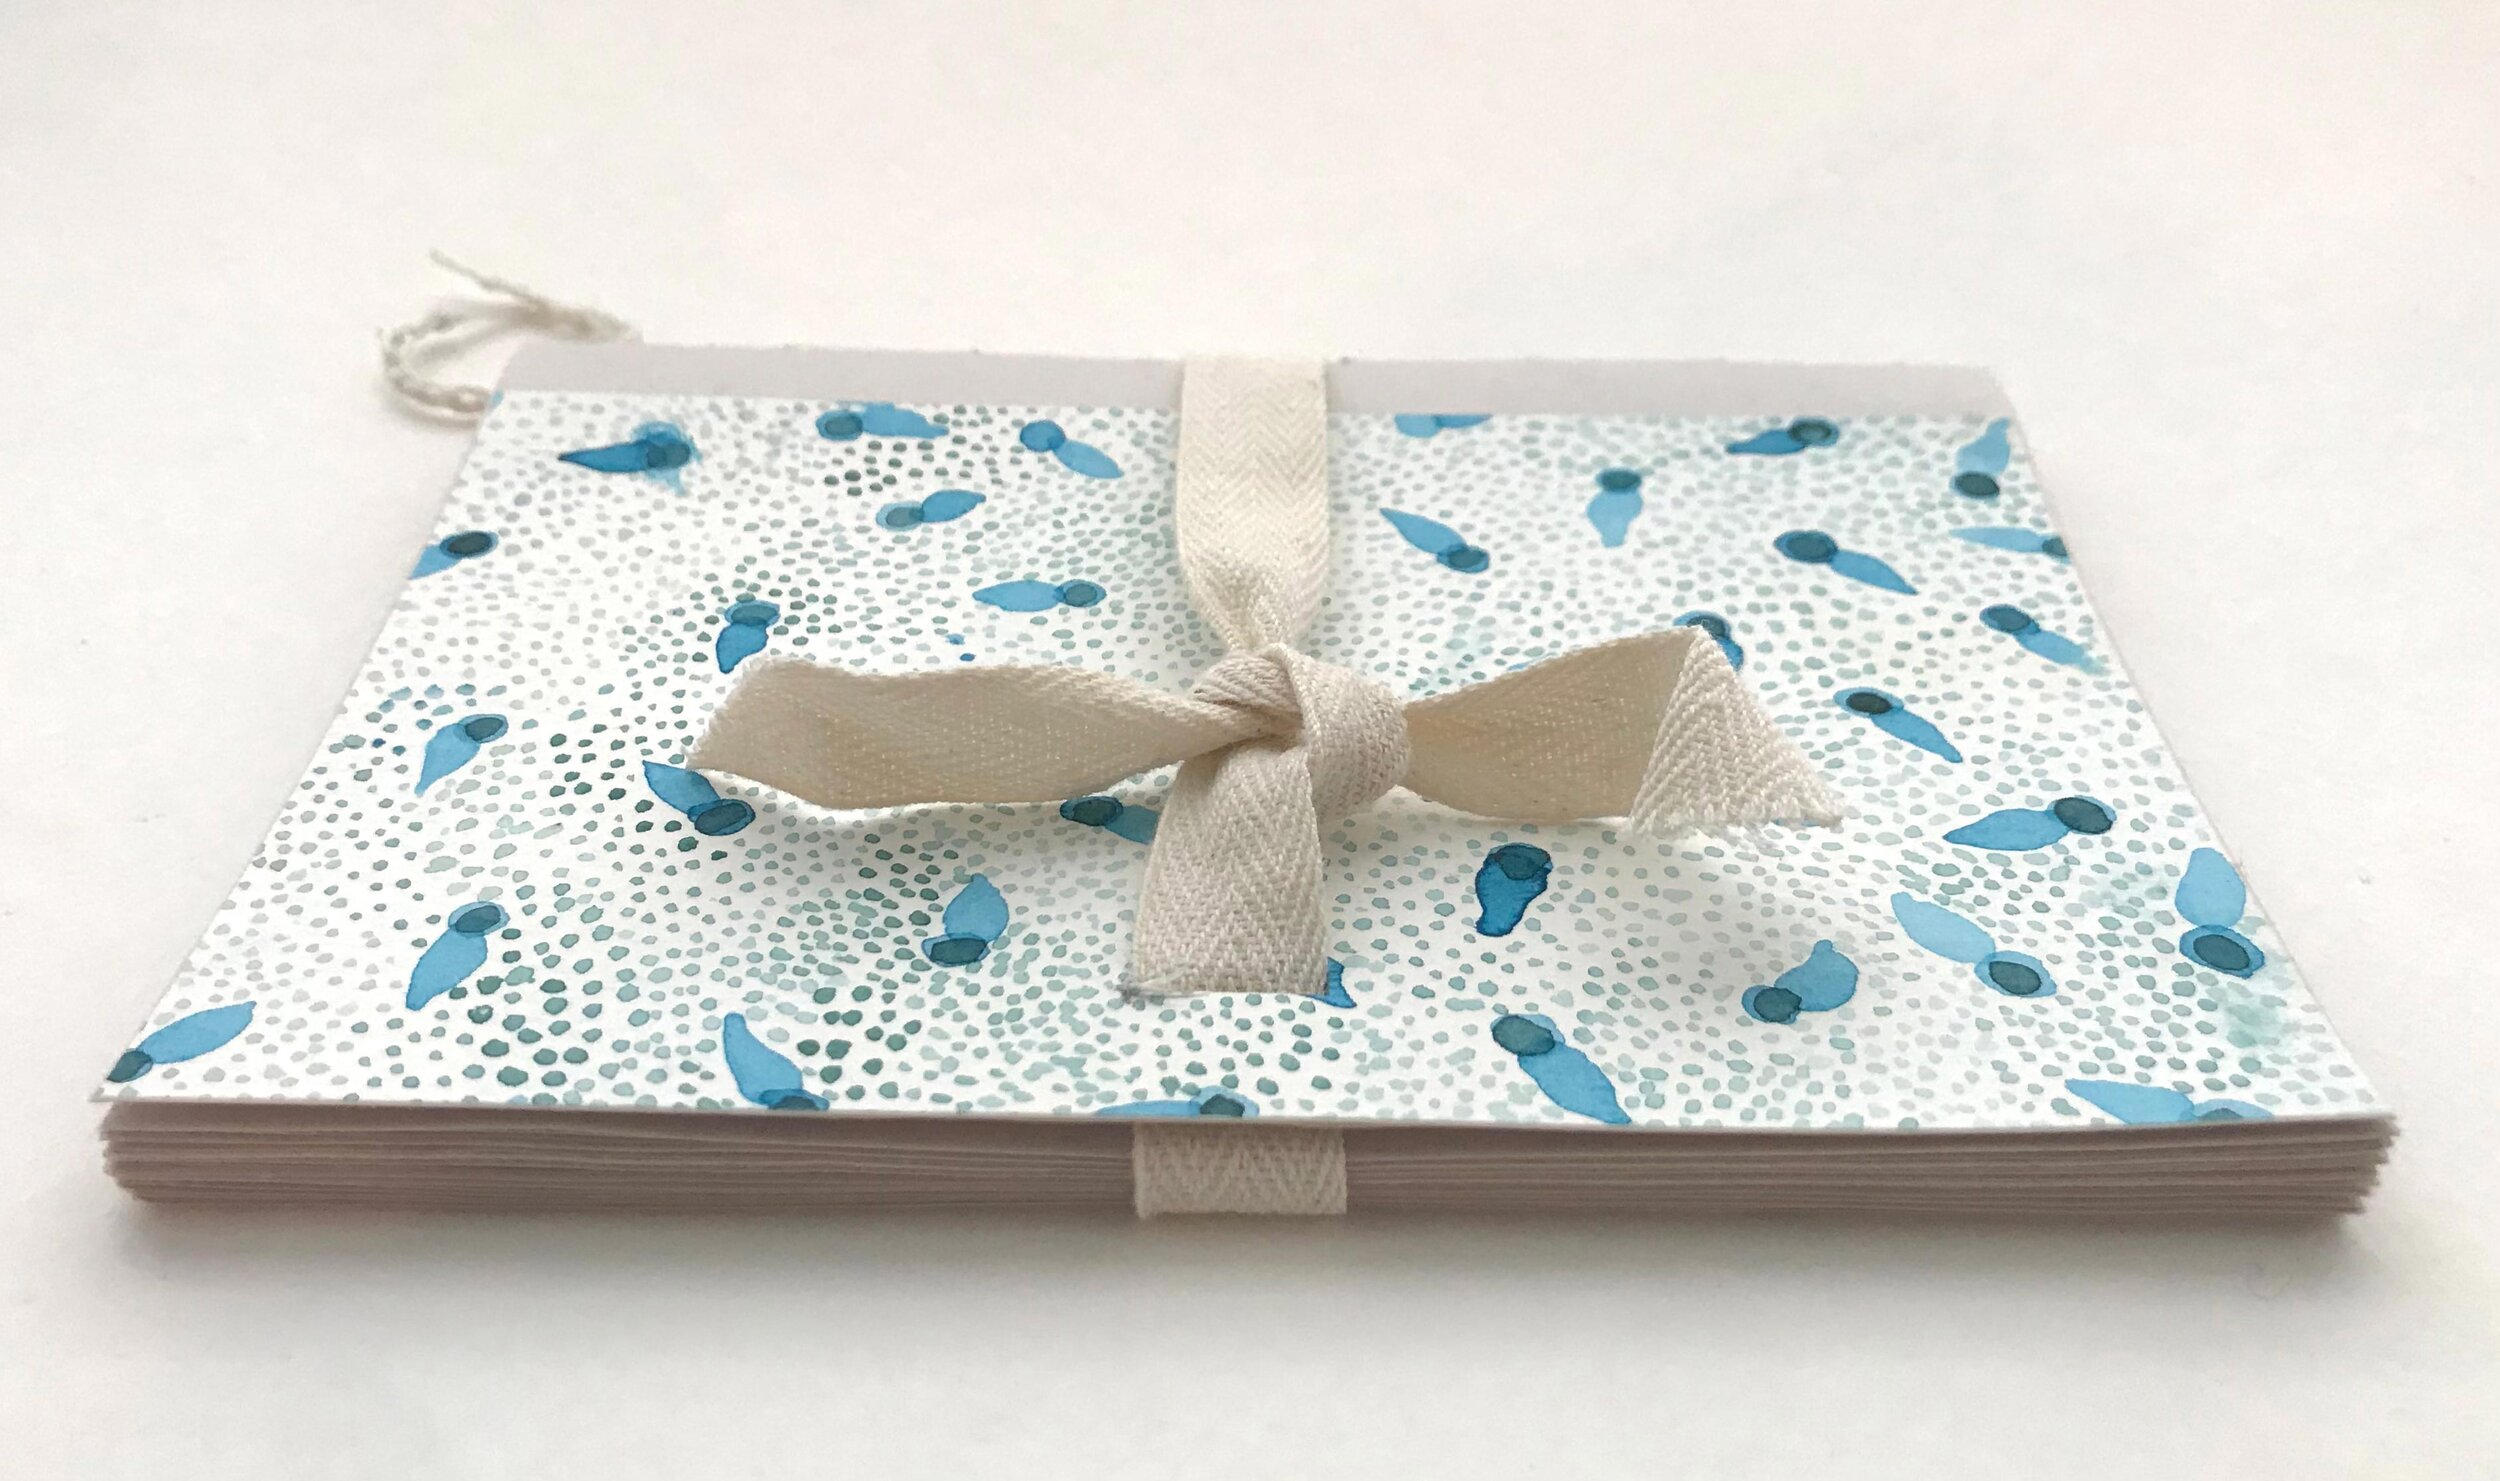
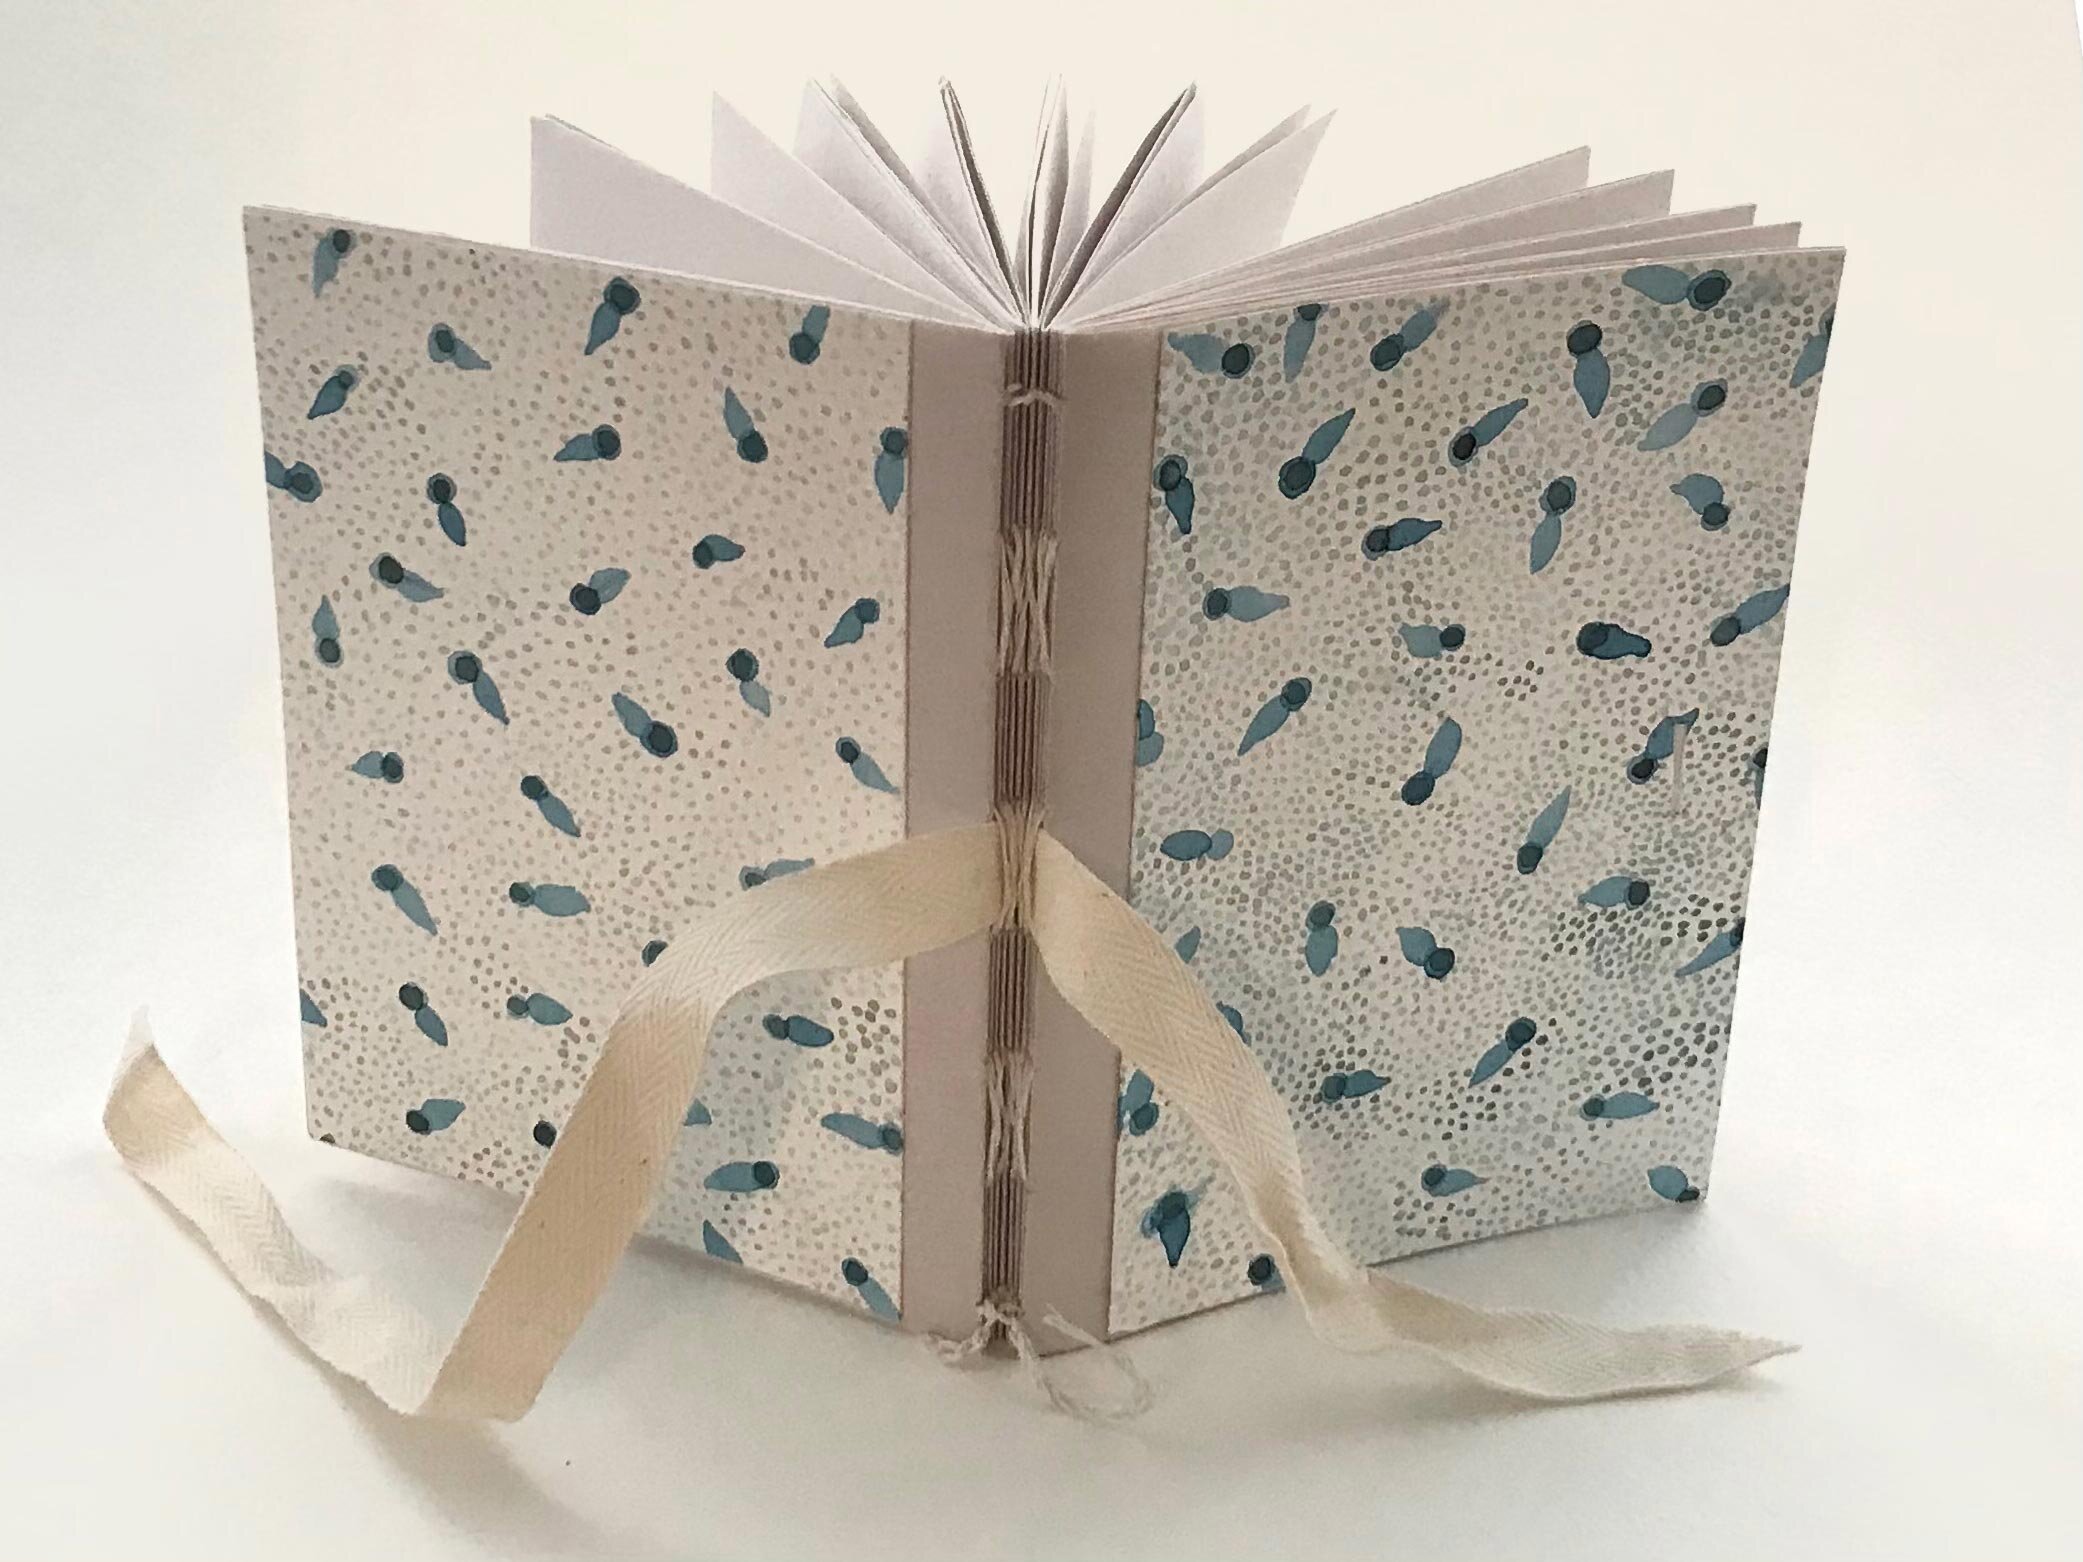
Below are the final photos of my sketchbook project. and I am well pleased with everything except the looseness of the pages. I am considering using a thin layer of PVA or hide glue on the spine to bring a bit of firmness to the spine area.
Possible ways to improve the sturdiness next time:
A sturdier form/clamping system when sewing
A thinner needle
Perhaps thinner thread
Stronger paper which might withstand firmer stitching
Changing the cover design to strengthen the binding
Try a new stitching pattern
I decided to organize my sketchbook around the class assignments creating a signature for each assignment and the proposed paper explorations. I chose a variety of simple papers of varying shades of neutrals (nothing precious). For interest I chose not to make all of the papers the same dimensions. This along with transparency creates a layered interest inside the book:

The outer newspaper strip serves as a title/banner for over a transparent marker paper that lets you peek into the project interior. The lined paper is from a disassembled vintage spiral notebook. I chose to flip the holes to the right for a bit of surprise and to form a visible border. The lined page will provide a place for the project summary. The newsprint is perfect for sketches while the nicer white drawing paper will feature the final project. The later half will provide a place for a reflection and a place to note inspiration/references:

I created a special signature at the front and back of the book to feature a bright color on the spine and to add a cover/fly sheet and create room for a Table of Contents. You can see that I also inserted a cut out from a set of blueprints for a vintage shed that I found squirreled away at my in-laws:

I chose to make my book boards narrower than the text block to feature the bright interior paper. The boards are covered with the envelope that the blueprints were contained in. The backside of the envelope had a rust stain from being stacked on something. I thought it would make a great frame for a title or label and you can see from the first photo at the beginning of this post that I took full advantage of that.

Be Frank
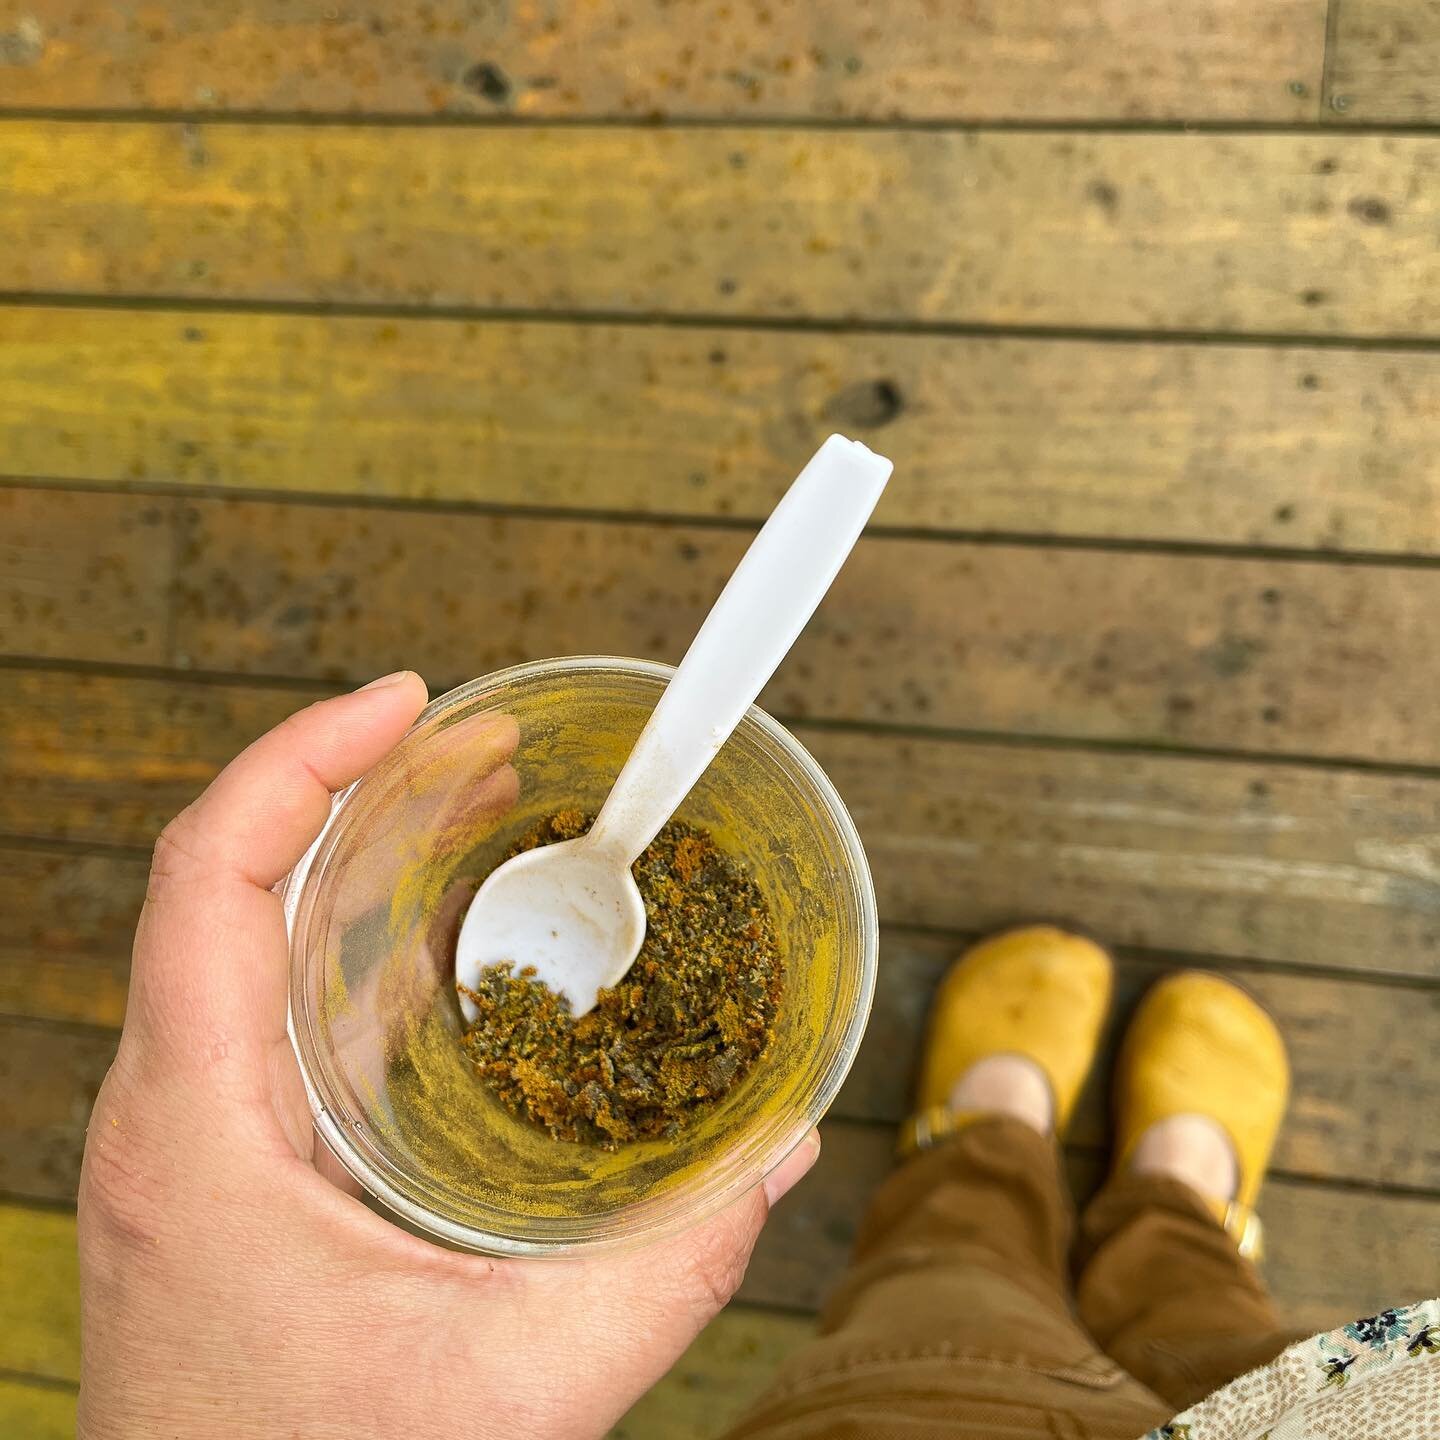
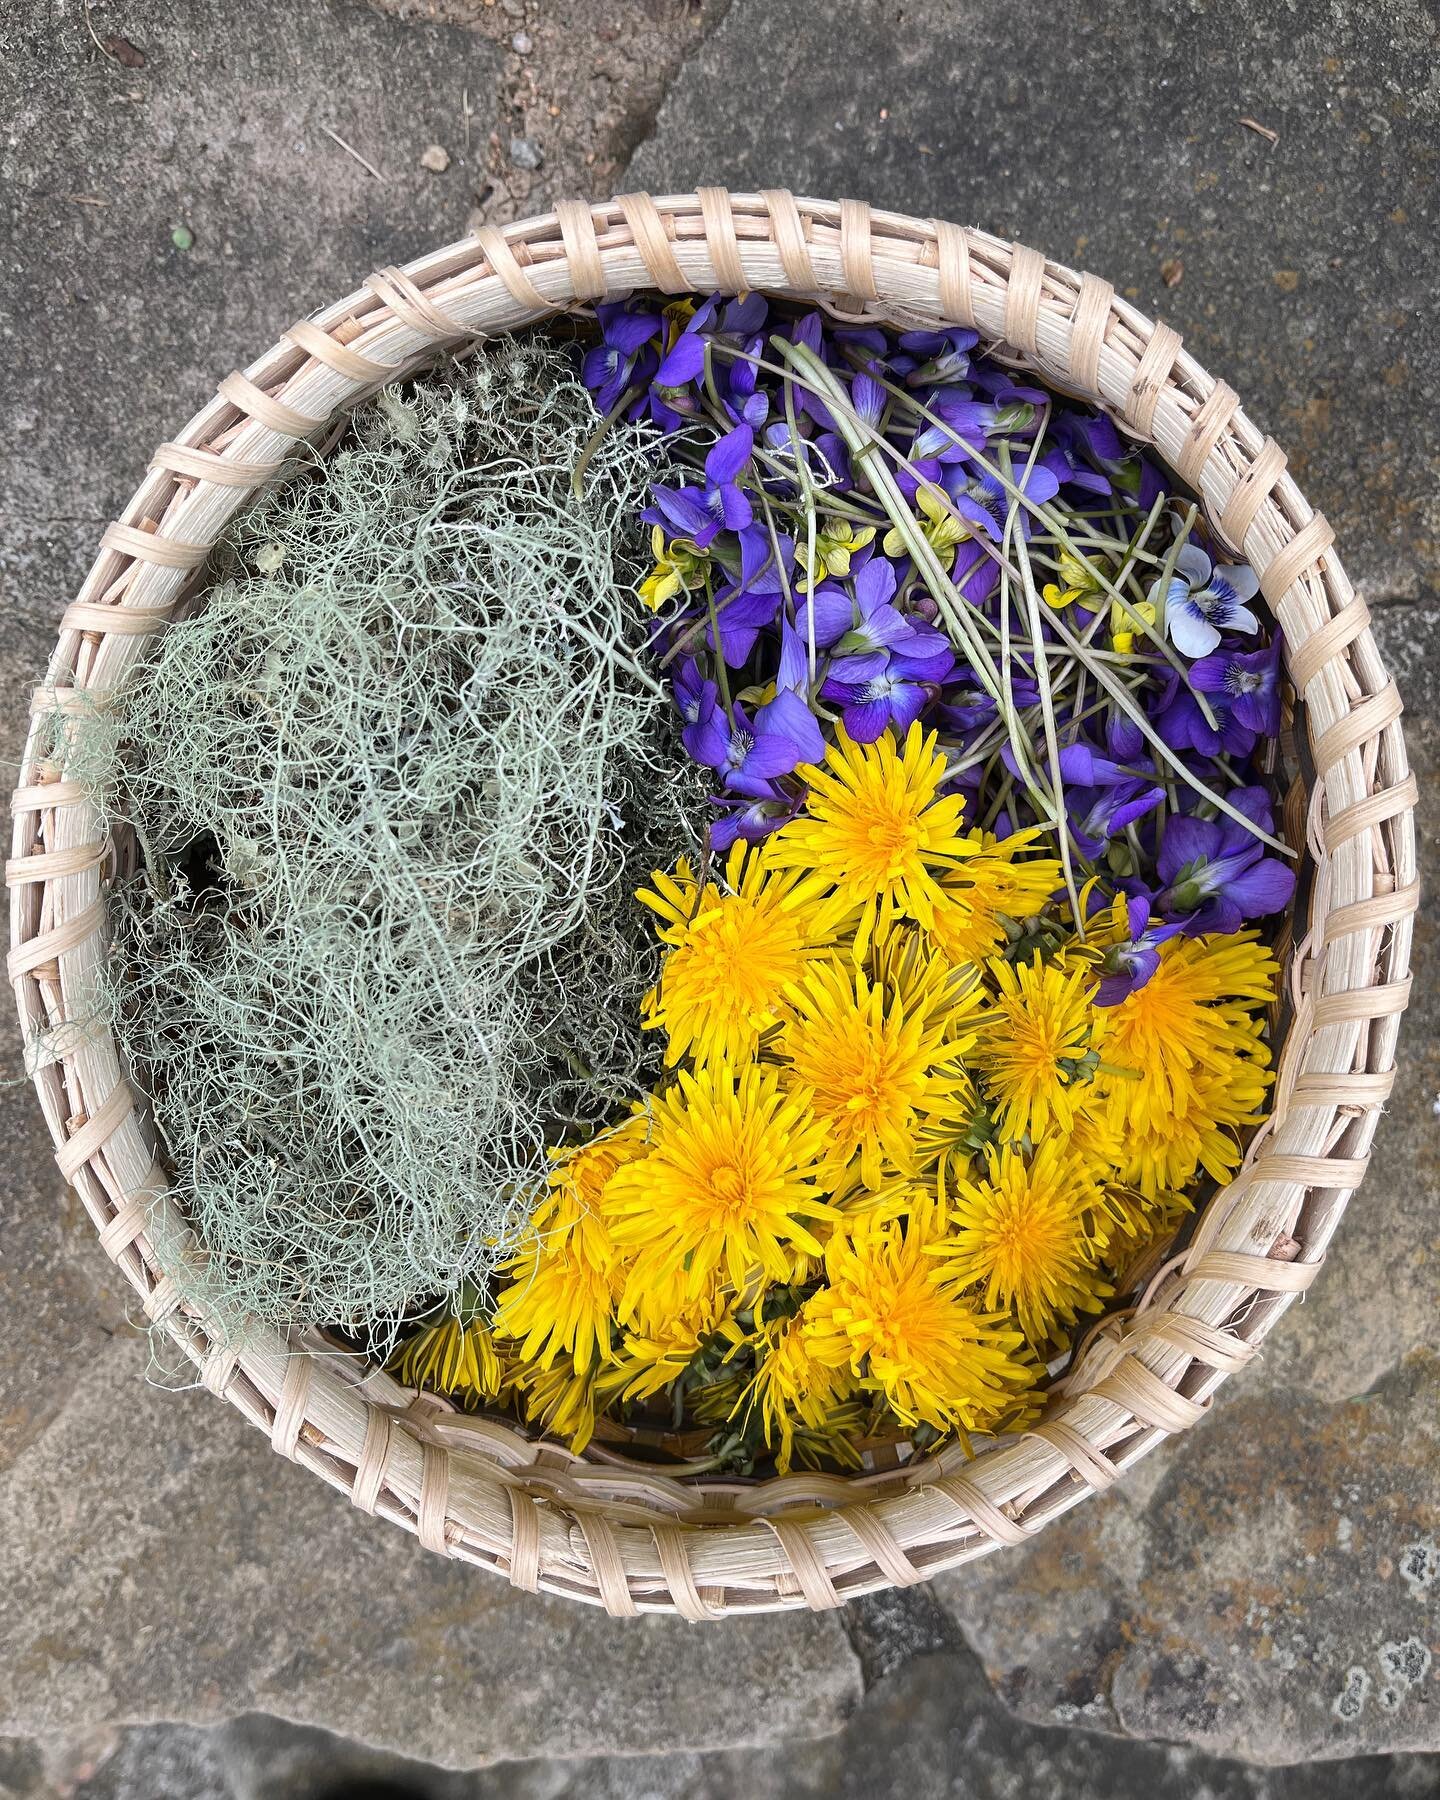
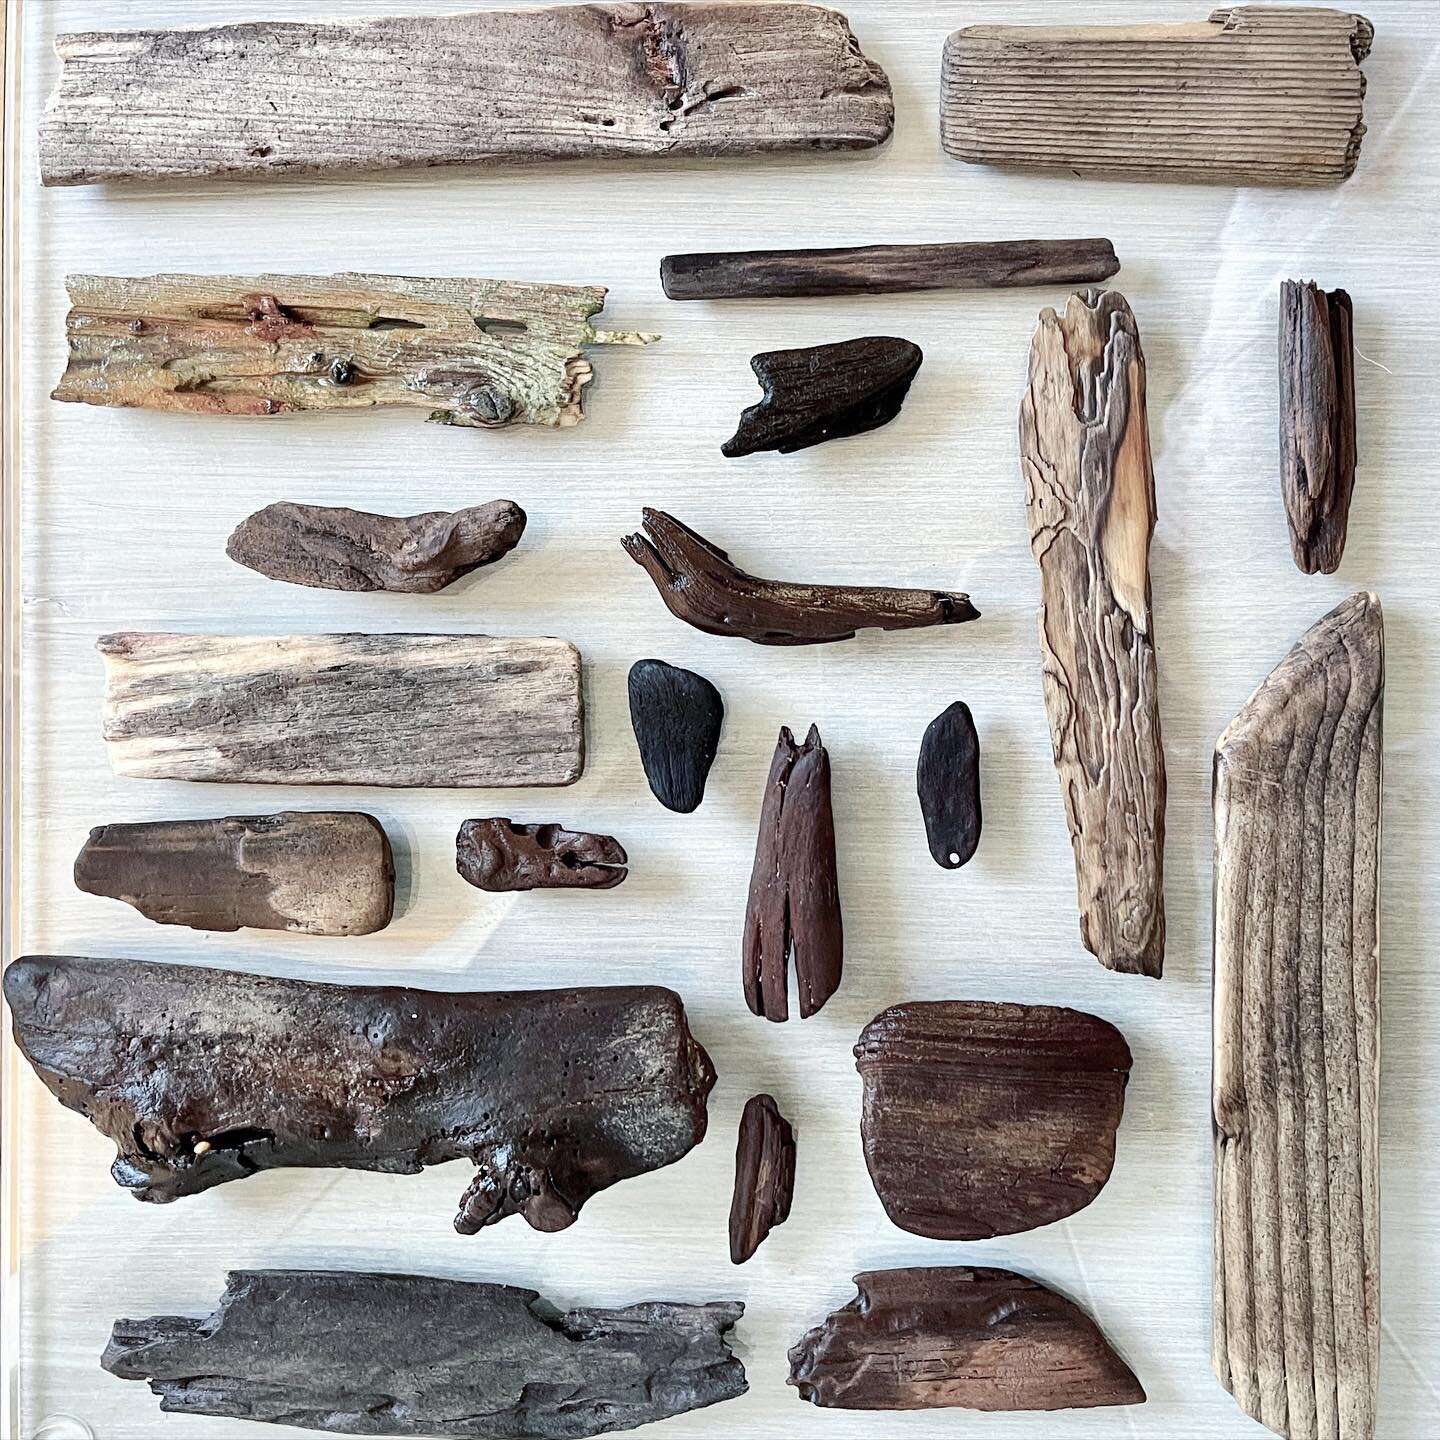
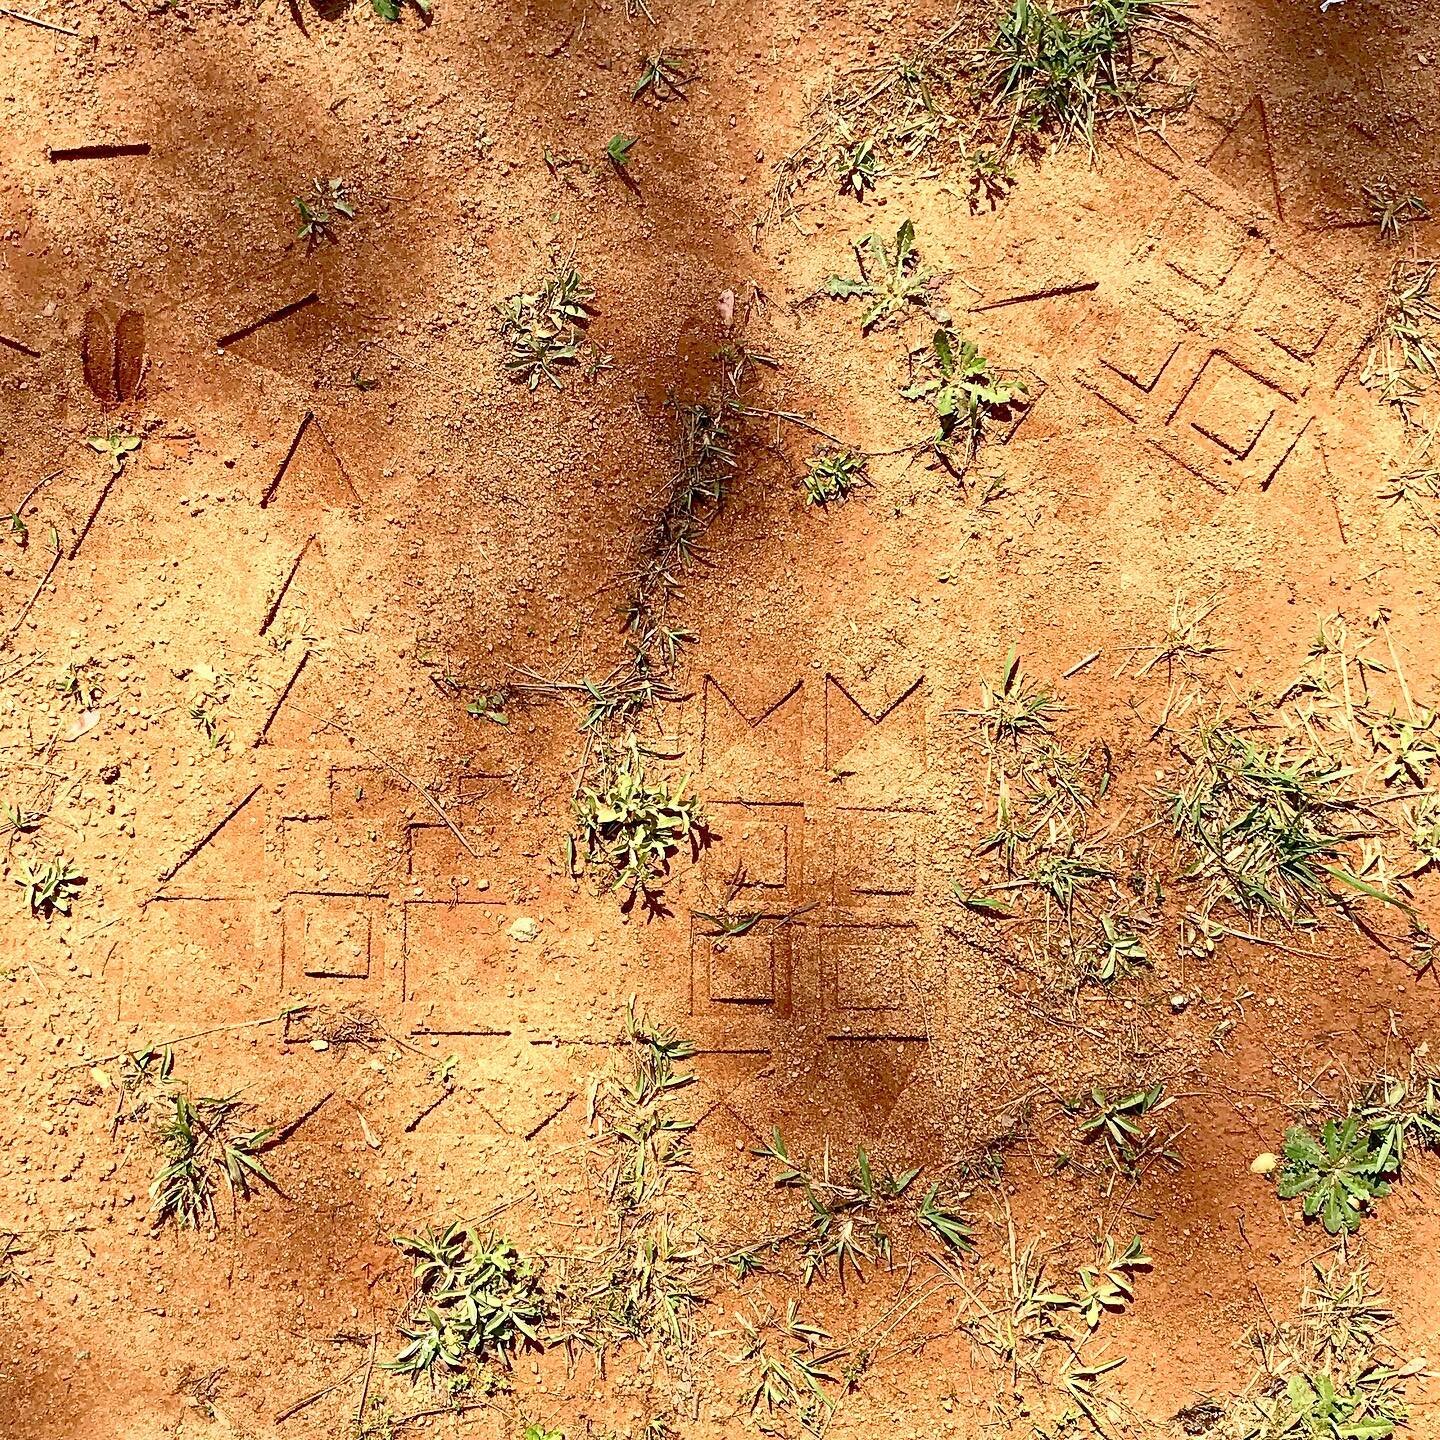
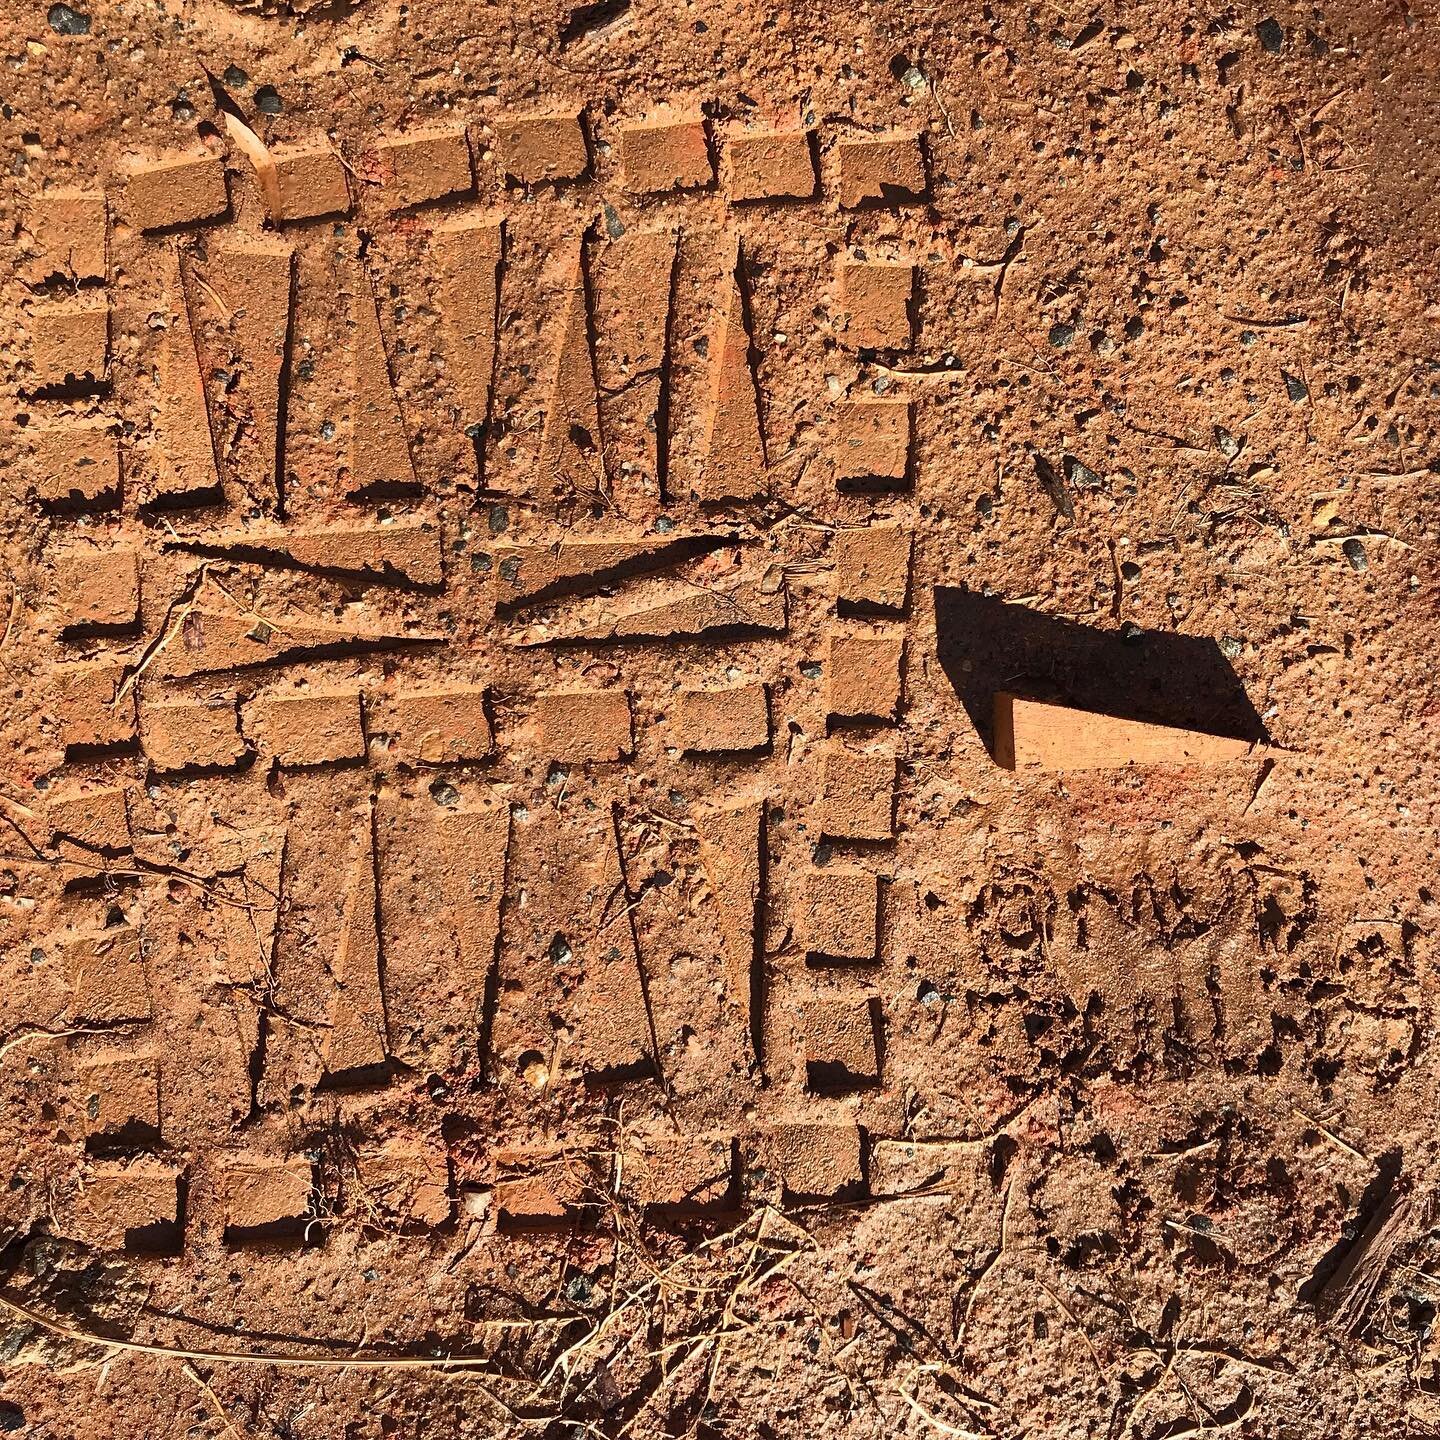
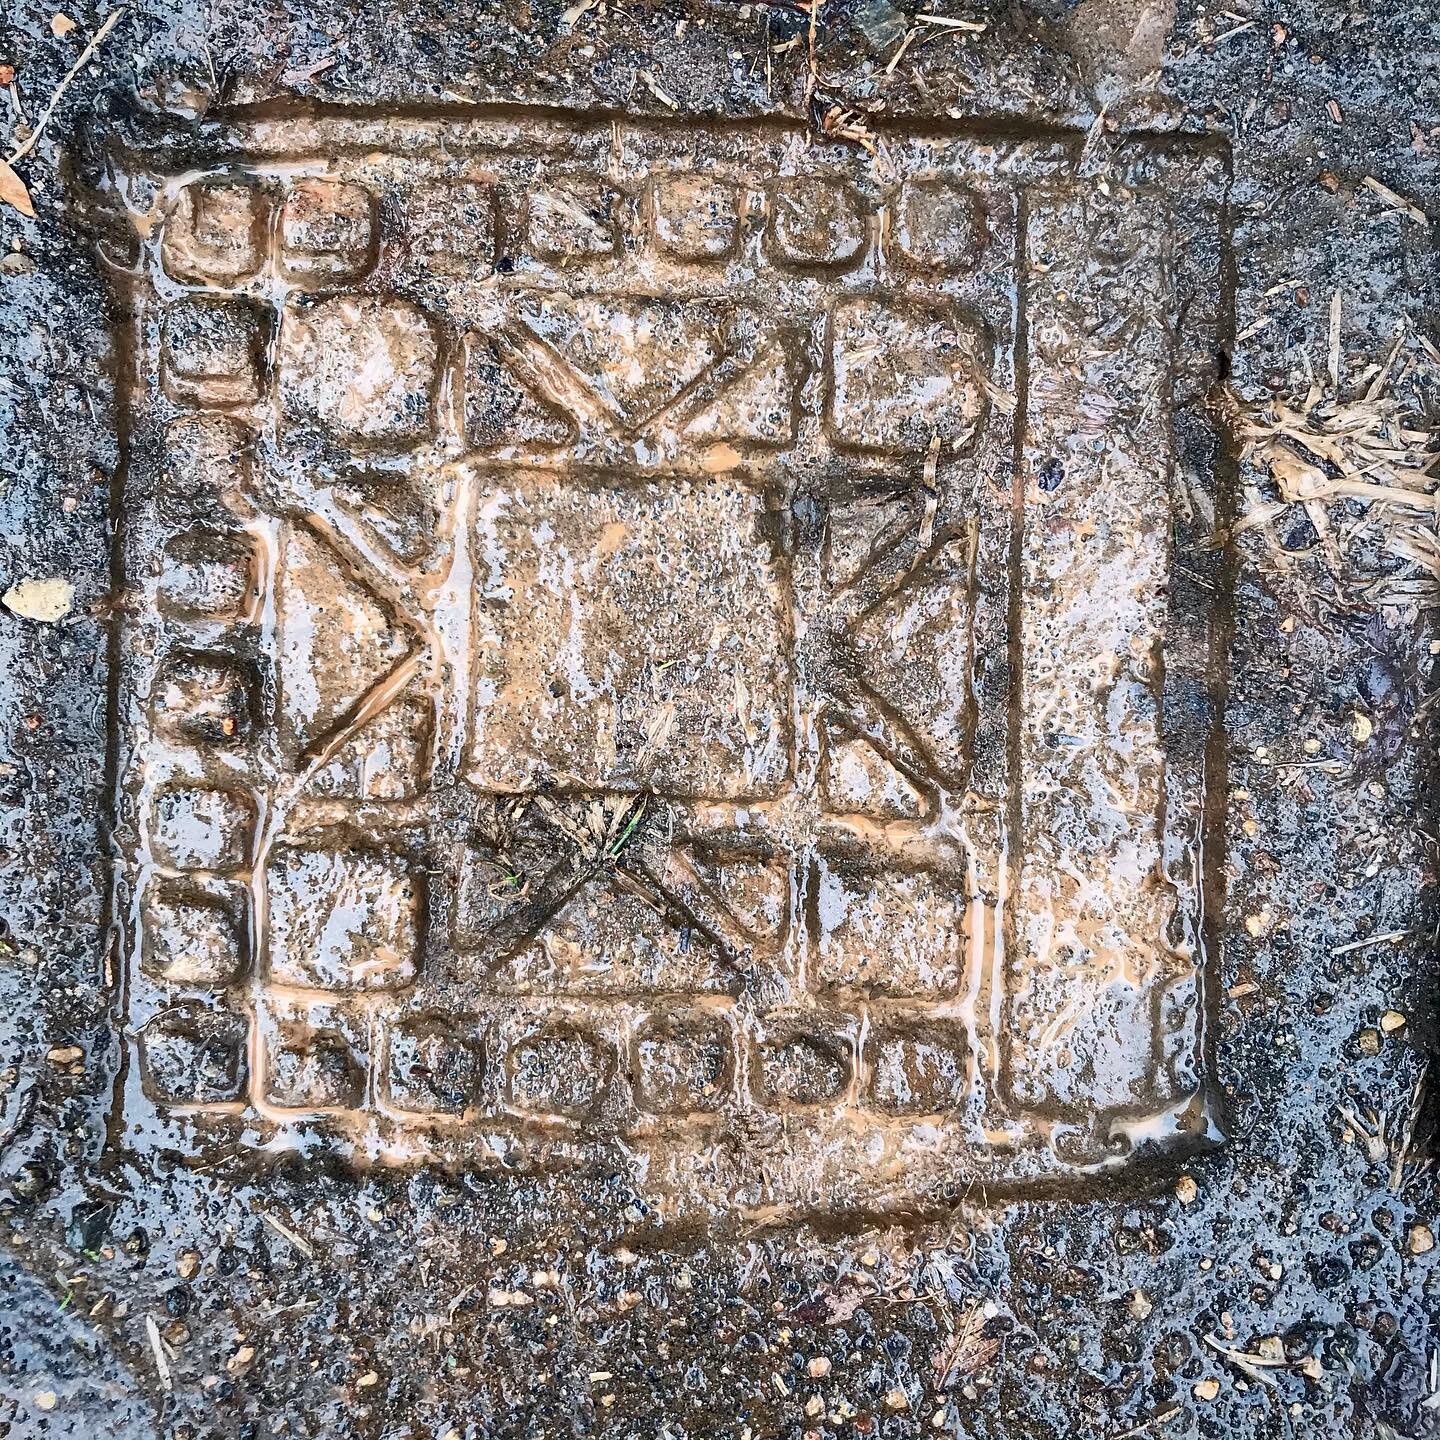
Today I visited Frank Liske Park after most of this weekends rains had subsided. I wanted to experiment with pressing designs into the ground. I took my quilt inspired watercolor palette from this summer’s Topics In Ceramics class and also some rubber letter stamps. I also played around with stamping with found rocks and sweetgum balls.
The sweetgum balls were too soft from the rain and gave way before making too much of an impression. The rocks did okay and with persistence perhaps you could find a rock with clearly defined edges that might work quite well. One thing that I noticed with the rocks is that it created a resistance/suction with the earth and sometimes a clump would stick to the rock and come away ruining the pattern. The rubber stamps did okay on some surfaces but are really too shallow to make much of an indention in the coarser grands of the surfaces I could find.
I thought that sandy breaks along the creek bank might work well but they turned out to be a bit to coarse and granular to capture good details. In the end I good a good impression in a muddy road exiting a picnic area – this is the Impression that I chose to document:

I experimented documenting an Impression with my GoPro and also documented other things from the site– some videos of the storm water flowing over the rocks and waterfalls, some beautiful fungi and a bright chartreuse lichen. You can take a look at everything on Google Drive.
Goin' Visitn'
Here is this weekend’s progress on my next portrait:
The Bible page texture is a place holder from the internet until I can get a good scan of my own. I’m considering which book and chapter.
This is Virgie Crisp of Dry Creek which is located within the Stecoah Township. Virgie was known for being able to spit further than any man I ever knew and though her hair was silver turned a cartwheel at the drop of a hat.
Sundays growing up were often reserved for visitin’. After church services and dinner were over the older generation (many who were shut ins) would open their doors or sit out on the porch or even drag a bunch of chairs under the shade tree. The younger generation with children and the ramblers would drive up and down the creeks to visit. Sometimes you would pull up and hang yourself out of the truck window and jaw and sometimes you would get out and sit awhile and occasionally you were invited to stay for supper. We visited Virgie and her husband Bart many Sundays.
I’m not sure if this piece is finished or not - it seems that maybe there is room for something else thought I’m not sure what at the moment.
The Seed of An Idea
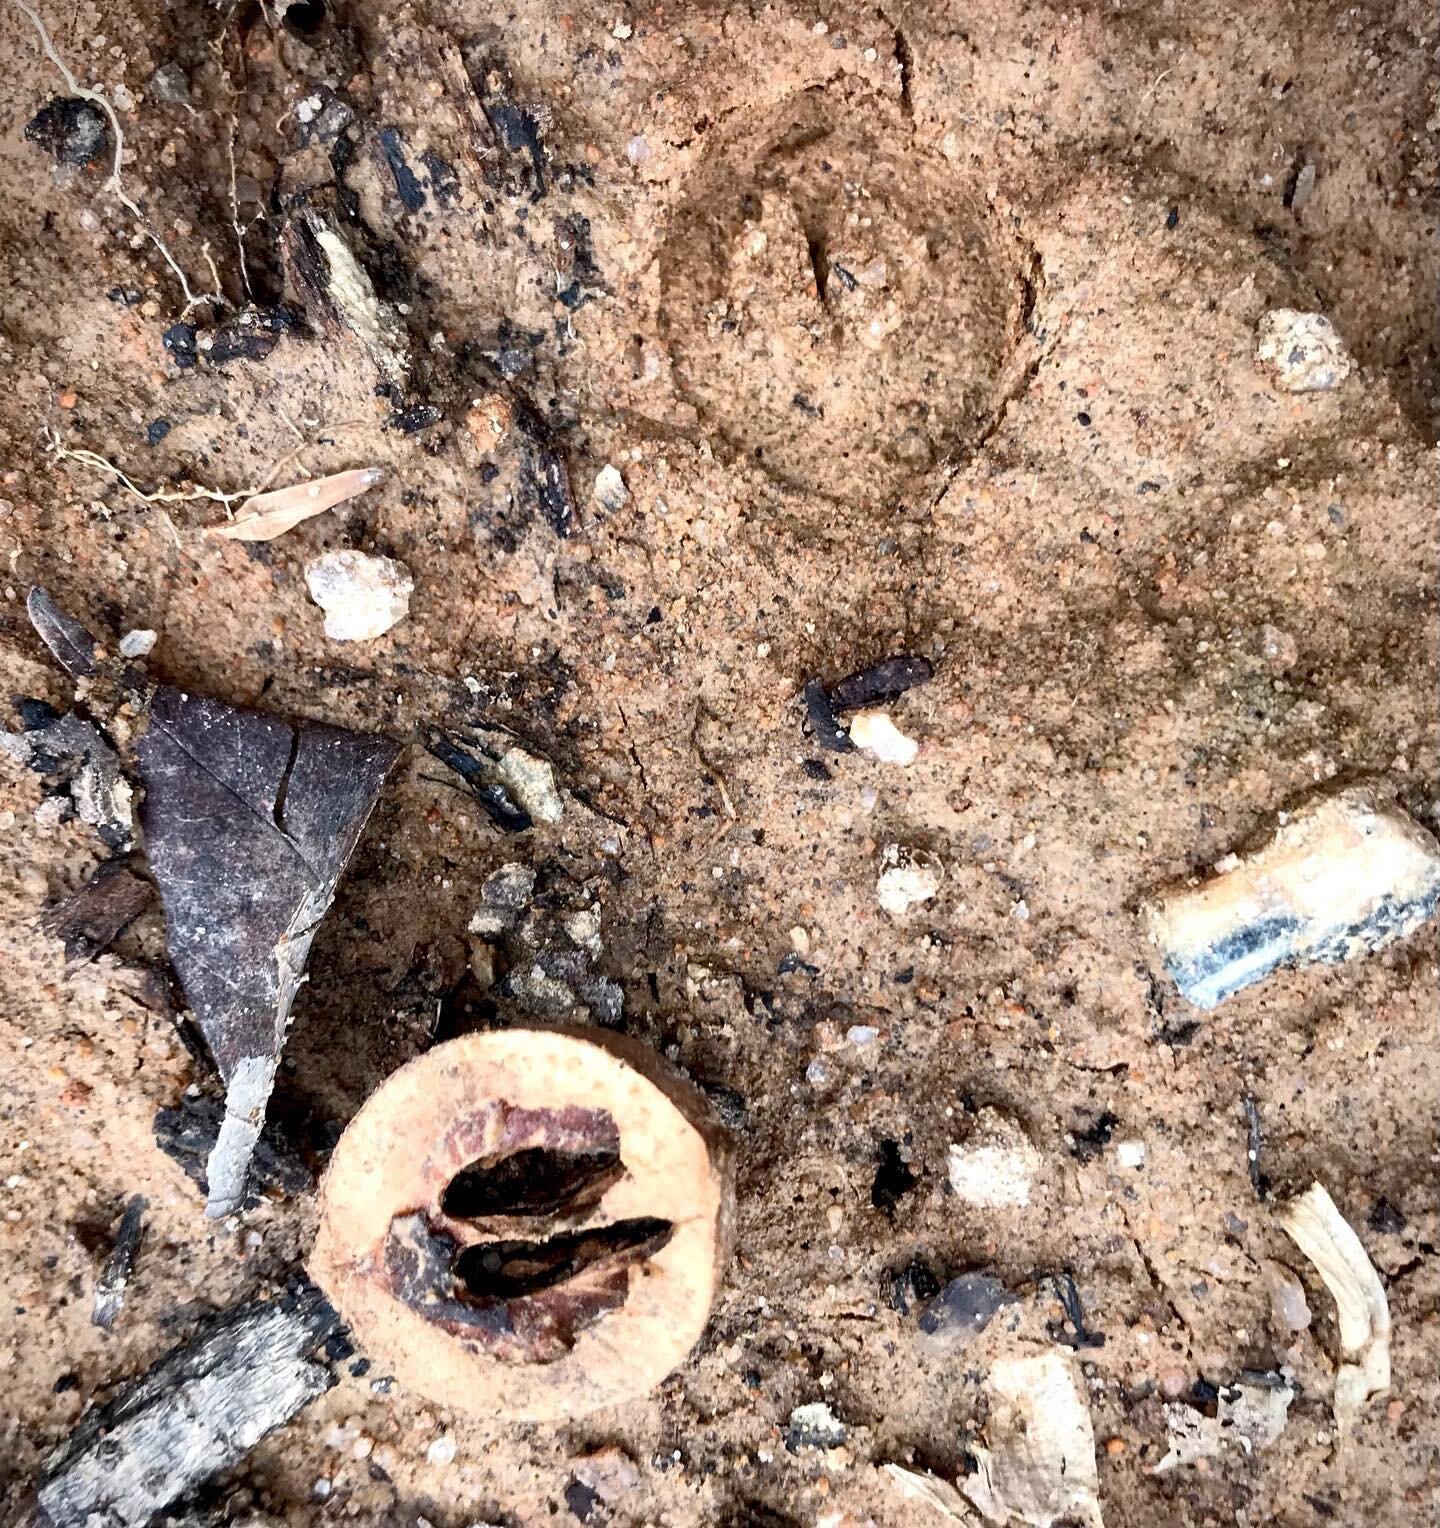
Today I began a project that I have named Mud Quilts which is my very first site specific project. I created an Instagram account to document each site and work. Visit MudQuilts if you are interested in following along as I’m not sure I’ll document every site in this journal or site.

This is my first Impression made with a hickory nut shell in the root ball of an old tree fall.
The main aim of this project is to bring awareness to and comment on the complicated way that we as humans shape and form landscapes and places as well as how landscapes and places shape and form our physical, mental, emotional and spiritual lives.
I have set up two very simple parameters for my project:
Neither to add anything to nor to take anything away from my sites but to only leave an impression once I’ve left.
Document each site on my Instagram account using photographs and the site’s geotag.
I plan to form a series of ceramic stamps in which to explore leaving impressions at each site location. One question that I’m asking myself right now regards water. Will I allow myself to moisten sites in order to achieve better impressions and if so can I bring my own water or limit myself to water sources at or near the site. I will post about those decisions here whenever I am forced to make them.
Interestingly, when I began this Instagram account and named the project by picking a hashtag I stumbled upon another artist , Terri Dowell-Dennis, who had used the hashtag #mudquilt a few times. I did not want to bomb her beautiful hashtag so I added an ‘s’ to mine. Her works involve playing around with symmetry of photographs of mud to create textile like effects. She has some other pieces which she calls ‘markings’ that are of a similar nature.
I am choosing not to follow anyone or add any hashtags to my posts at this time, nor am I posting about or linking to it from my larger personal Instagram account. I want to know what will happen if I allow this project to develop organically and fully free from the pressure of developing a social media presence. The project will be visible and can be located from this website and I will also be experimenting with signing and numbering each site with an impression. If anyone finds the site they will be able to locate the project by following the tag.
I think this has the potential to develop into a collaborative project by sharing ceramic stamps with others and receiving stamps from them in exchange. I could host an event and invite the public to participate in the making of a quilt, etc. This could add another layer of meaning not only to the process but also contribute to the understanding of the main premise.
Experimental Wood Kiln Version 01
This post is a documentation of the building of and the dry run firing of my very first wood kiln. This kiln design is not a copy of a design from any book, website, or video as I don’t have enough bricks or the exact materials for the many many examples that I’ve seen.
Instead what I attempted to do was to take what I know and understand at this moment and the materials I currently have on hand and build something that works. I define working at this moment to be that I can build and maintain a fire and that there is a ‘draw’ that brings flames and heat into the ware box.

First dry run of this very small experimental wood kiln fired on November 10, 2020.
What I have on hand are some kiln shelves from the electric kiln that I am converting and a few hundred fire bricks that I picked up from Craigslist during lockdown. The bricks that I have were fired to and rated to withstand 2000 degrees. While these bricks will not withstand the higher temperatures of Cone 10 firings I’m hoping that I can reach at or near Cone 6 temperatures with them. Of course the kiln design will need modifications and insulation to reach those temps.
Whenever I take on a project like this I always try to involve the boys - and take advantage of their energy and muscles.

Joseph helping to make a smoothe but not necessarily level spot to build on.
I do not plan on building any permanent structures in our current location therefore I am not taking the time to dig and level a foundation for now. I plan to take my knowledge to our property in Appalachia where it makes more sense to make that investment. I’ll be able to take up the bricks and rake up evidence of our work before our house goes on the market.
Below is the foundation level of my design.

In my research one issue many first time kiln builders had was that they made their fire box too small.
As you can see here the fire box is fairly generous compared to the size of the ware box. I made the fire box large enough to slide in the wood grate from our stove but narrow enough to be covered by my kiln shelves. I will have room and bricks to make it even larger at a later date. Another issue that many people had in their first kiln designs is that there was not enough draw to bring heat into the ware box and and not enough air in the firebox to keep it burning.
Another issue I’ve seen especially in very small kilns is that things heat too quickly and there’s no way to control the ramp up of heat. I’m not sure I’m going to be able to do that with my design either but I’ve taken a stab at it. From this side view you can see that I left two small gaps in the sides of the firebox to increase airflow. Because of the wider base I can easily place bricks on the sides to cover or partially close these gaps. My hope is that I can control the size of my flames and speed of the burn with these slots.

You can see from this side view that I left two small gaps on each side of the firebox.
I did not take the time to build a chimney on this kiln. My ware box is small and I made it only tall enough for the small pieces that I’ll be test firing in it. Instead I placed bricks at a 90 degree angle. These bricks can be removed to add trash or soda or to open up like a damper. I left this one gap open - this is the main source of air for the draw in my kiln. I have the ability to stand or lay a brick on these steps to completely close or partially cover this opening. In effect it’s a very simple damper.

You can see from the back design of my kiln how I tried to use my lack of half bricks to my advantage.
Because I built without a plan I had to respond to design problems on the fly. There was a gap between the top of my firebox and my ware box. I decided rather than tearing down and redesigning to instead turn two bricks on their sides to cover the hole. I’ll keep this issue in mind when I do the next build and think ahead about how to approach this flaw in my design.

I’m including this photo to show how my kiln was designed ‘on the fly’ so to speak.

Closing the gap.
I was surprised by how easy this kiln was to stay lit and draw. The ware box heated up nicely. I have a new pyrometer that I’ll be figuring out how to put together and use today. When I fire I’ll also be placing cones in my ware box to help me know just how high of a temperature I can achieve with this simple design.

Here you can see the flames moving into the ware box.
There are a three simple things that I know will improve even this simple design. The first is adding insulation. If I elevate the kiln off the ground on cinderblocks that will provide some help with loss of heat to the ground. Even better would be to put a layer of soft brick between the hard brick and the cinderblock. I think I have enough soft brick to insulate the bottom of a small ware box.
The second is sealing the cracks between the bricks on the ware box. I could add a layer of ceramic insulation to the lid and or sides or just use some waste clay.
The last is to choose my fuel carefully. Using a dry wood with a high heat value would work better than just burning what limbs and such are laying on the ground. I’ve saved a few scraps from our wood shop but a visit to a saw mill would be better.
Today I am going to learn to use my pyrometer and make an experimental wadding using waste clay, coarse sand and fine sawdust. I’ll update here with my results when I’m able to do a complete firing.
Beginning Anew
A blog about beginning anew with ceramics after more than twenty years away.
There is no way to begin again except to write the first word and post a new picture.
First, I’m just going to show you a picture of something that I worked on today and then in some later post I’ll try and explain more about what has happened in between the freelance graphic design and illustration work you see on my website and the work in this photograph:

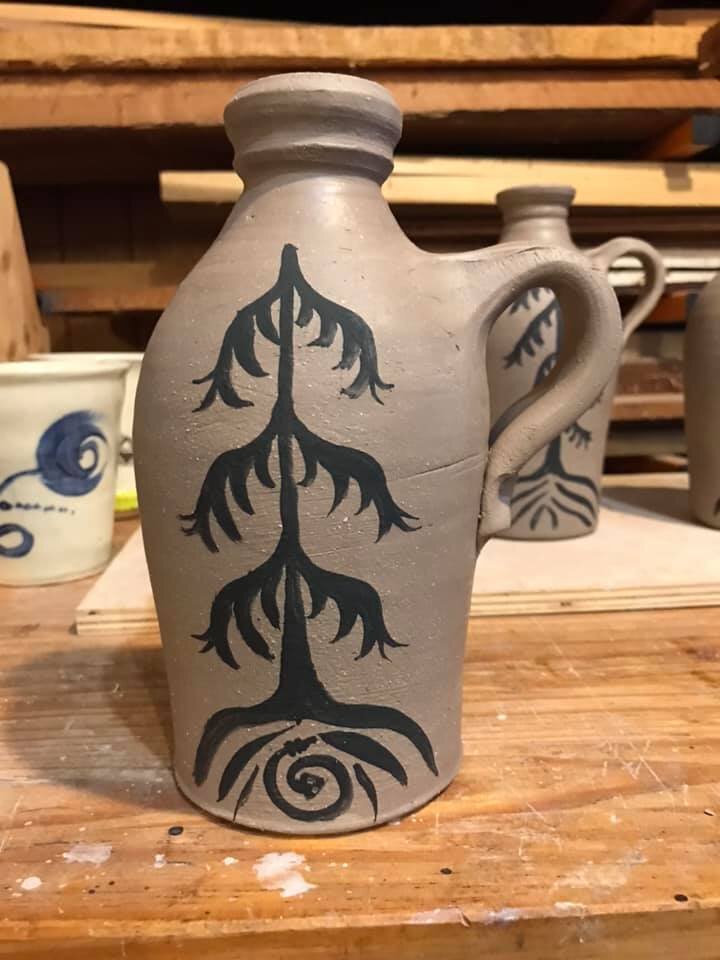
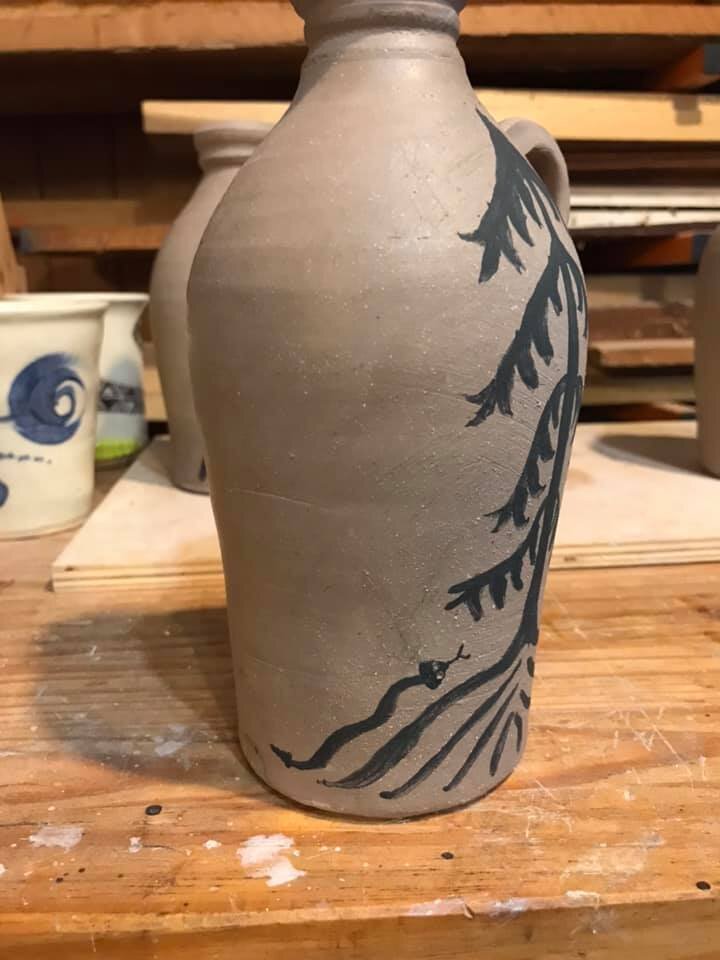
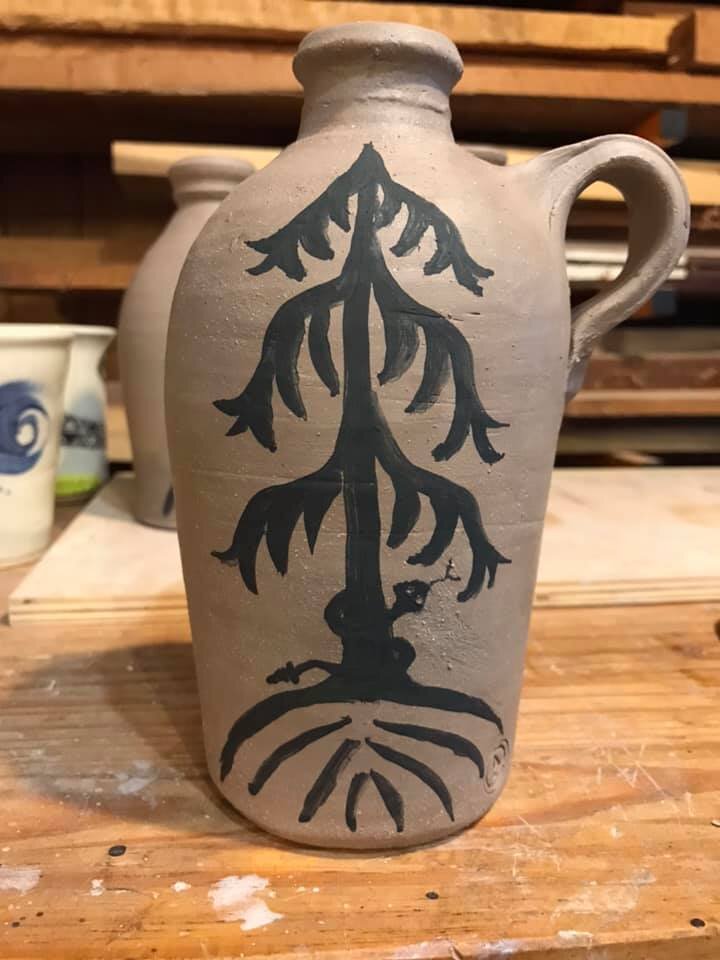
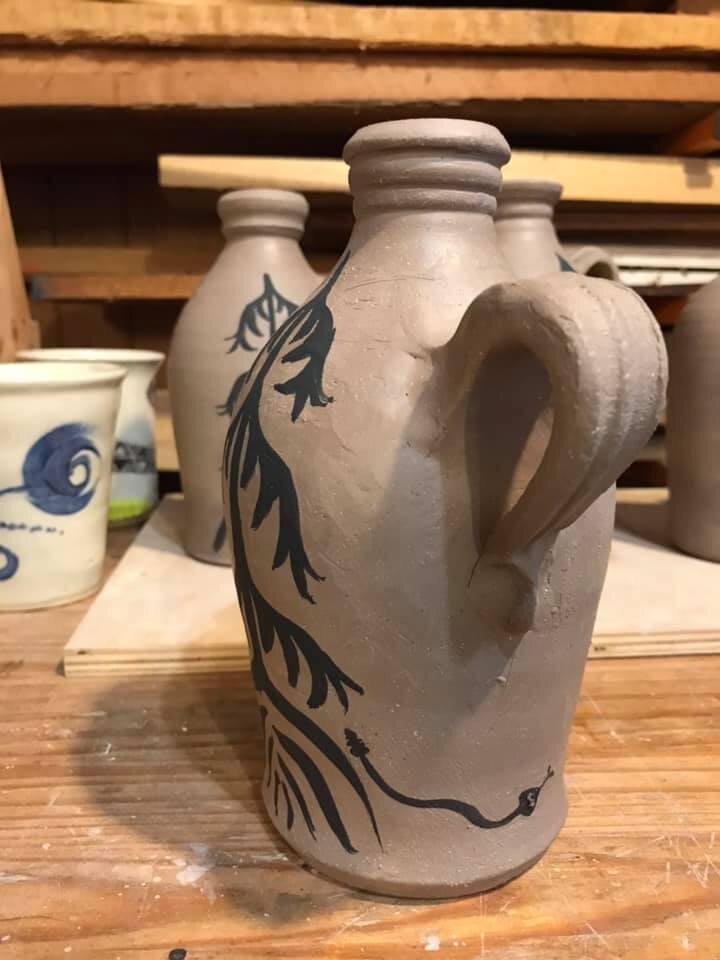
Small Story Jugs – Rattlesnake Series 01
The decorations on these jugs were drawn from a previous sketch piece:
I really like the repetition in this cylinder between the fruit tree and the evergreen tree and how they fill the space on the cylinder. I am also trying to be conscious of my studies of Walter Anderson and his design work as I paint. When I first saw his ink sketches in his museum in Ocean Springs, Mississippi I was so drawn to his use of near symmetry.
To the right are some close up pictures of the snakes in this series. I like that they are connected but not tied together – the jugs can be rearranged and the story shifts slightly:
I purchased new brushes after completing my sketches but I still need a lot of practice painting on a curved surface. These are all done freehand with no sketching but I also I need more practice controlling the movement of my brush right to left.
In the jugs I focused solely on the evergreen form. As I paint I am trying to communicate the shape and feeling of our native hemlocks whos majesty we have have almost entirely lost in the last decade.
As for the jug forms themselves I really like the shapes that I achieved and am especially happy with the necks and rims. I trimmed the feet on the wheel and rolled the foot to create just a slight shadow as the jug sits on the surface.
I still have much practice to perfect handle pulling. These handles were first attached to the jug and then pulled. A couple I redid – one more than once. I like leaving finger marks.
I will be exploring these little vignettes further in work to come.
Applying for BFA In Ceramics
In January I decided to return to university to complete my degree. The boys are older, we are planning a move back to the mountains, I really didn’t have that much course work left to complete, and I decided that if I was going to finish I should just do it.
Yeah, 2020 was the perfect year to turn my life and our homeschool upside down to try and finish my degree…
I eased myself in during Spring semester with only two classes - a Liberal Studies general ed requirement and a Digital Media Design class. Maybe I’ll share more about my coursework and experience with those classes some other time. Enter in the worldwide pandemic and all classes moved online. We had to rearrange the entire household to give my husband an office with the door and get everyone online for school, music lessons, etc. Turmoil…
I had hope that we would be back on campus for the summer. I had planned an independent study in Ceramics to help me get my bearings again with clay before beginning projects classes– it had been almost 20 years! Like most of our plans for this year they were just washed away. There was a smaller class offered remotely this summer called Topics in Ceramics. It was a lovely little class with several fun projects. Also during the summer the boys and I dug and processed clay from our creek and drove to Virginia to buy a kick wheel. I’ll tell you all about each of them in turn some other time.
This Fall Semester I have been attempting to carry out the Independent Study that I had planned for the summer. Enter a huge tree falling on our house knocking a hole in the boys bedroom during Jae Emerling’s lecture on Surrealism. Just when I was getting the insurance stuff sorted out with that disaster I was rear-ended on the way home from a photography workshop sponsored by Atkins Library. It totaled my car, gave me whiplash and gave me a second baptism of insurance paperwork, phone calls and emails. And of course this happened during the two weeks I had set aside to put together my portfolio slideshow for my BFA review. I pulled it together but just barely! You can take a look at the slideshow here:
I’m now digging deep and pressing forward to complete as much work as I can for my Independent Study. I set up a smorgasbord of things to play around with during this semester. In some ways it is very much akin to a sampler quilt. I’m gathering together as many techniques and ideas as I can to give me things to pull from in upcoming projects and thesis classes.
Motherhood in an Art Museum

(This was written in 2012 and polished up and given as a supper talk for the Paideia Fellowship on February 20, 2017. Visit the Charlotte Mason Institute to read the companion article Self Education in the Art Museum.)
After the weaning of my fifth son, my husband; who knew how overwhelmed, weary, and depleted I felt; gifted me a class from one of my favorite knitwear designers. The class was in Atlanta and I decided to ride the train. This gave me the entire weekend to myself. I stayed in a bed and breakfast and planned to spend the majority of my extra day at The High - a Leonardo Da Vinci exhibit was being advertised all over the city. In total I spent only about thirty minutes with Da Vinci - it was some of the smaller gems of the High’s permanent collection which captured my attention.
I suppose that I thought my time away would be just that - a break in which I would not think about the kids, housework, or homeschooling. I was alone; nobody to converse with; and so I was granted a needed perspective to examine my mind and my heart. I suppose it’s no surprise then that the works that spoke to me most that day were all pieces dealing with the subject of motherhood.
All three of the pieces I share with you are located in the Stent Family Wing which contains European art from the 14th to 19th centuries. I spent the first couple of hours that morning after viewing Da Vinci, just wandering through the gallery - examining, thinking, making a few notes and observations. During lunch I looked back over these notes. As I read I held the paintings in my mind’s eye, rearranged the pieces, grouped them and categorized them differently than they were displayed. Three pieces in particular tugged at my heart and I decided after lunch to go and visit each of them again. Why did they call to me so? I had a feeling that the Holy Spirit was teaching me about myself through these works.

Maternal Love by Hughes Merle
The first work was Maternal Love by Hughes Merle. It is a very beautiful painting - a romantic, Utopian depiction of a youthful mother and a cherubic child. The child is captured on that fleeting day between infancy and toddlerhood - rosy cheeks over creamy skin; clean and neatly dressed in the heart of a sylvan forest. The child sits on his mother’s lap and it’s obvious that the title Maternal Love is an apt one - or is it? What unsettles me about this painting?
I gaze at it and imagine the two other pieces displayed one on either side. What’s wrong with this picture? The child’s face is tilted up for his mother’s kiss but neither of them is looking at the other. Both of their gazes look emptily aside into the forest. The mother’s arms encircles the child; her hand clasps his arm as if to keep him or make him stay. One of the child’s hands looks as if it’s ready to push away - wanting down - the tilted cheek asking for her blessing to go, but he is kept; kept by her encircling and clasping.
Maybe it is an innocent desire to keep him from harm or from getting dirty, yet my heart tugs. This fleeting age goes so quickly - gone almost before it arrives and it is natural to want to keep it and treasure it. Why then is her gaze averted? What holds her interest apart from her child? I know that longing - a mother who sees her own youth and desires just as fleeting as the days of her child. A mother who says, “Wait,” and expects him to remain just as he is - unchanged - until her gaze returns. I know this mother who longs for the freedom outside of motherhood. I meet her in the mirror some mornings.

Mrs. Morse and Two Children by Samuel Morse
I go again and stand in front of the portrait that Samuel B. Morse painted of his wife and two children; Portrait of Mrs. Morse and Two Children. I sit right down on the tile floor and let myself be schooled by her. How much did Morse understand of what he was saying about his wife when he painted this piece? About her personhood and character? She cannot be mistaken for the sensitive, vacant, romantic mother of Merle.
The setting of Morse’s painting is a noted contrast to Merle’s. Here is a family, in an interior scene reminiscent of a classical structure. Fatherhood is abandoned in Maternal Love but sitting on the hard floor I could feel the presence of Morse even though he is not pictured in the painting. He has painted a column directly behind his wife thus depicting her as steadfast in her role of motherhood. And yet she is not aloof from her children but rather accessible - in their midst - encouraging them to stand and explore on their own. The large expanse of sky which makes up the remainder of the background paints the freedom fostered in her motherhood.
This is reinforced with her gaze - intent on her infant who is trying unsteadily to stand on his own. Even though he is perched atop a pillar, she supports him ever so slightly - only enough to keep him from falling - careful not to hinder his movement. The older child blowing bubbles is confident in her ability to amuse herself. She leans against her mother - perhaps to feel her strength or comfort. She knows she is free to play and explore and her mother’s attention will be there when she returns.

Woman of Boulogne Nursing Her Child by Jules Dalou
I cross the gallery to the third work; a smallish statue displayed at eye level on a pedestal. A Woman of Boulogne Nursing Her Child by Jules Dalou. This mother holds her babe with the confidence of one who has had a long motherhood. This is not her first child. She holds her breast expertly with a knowing and willing nourishment and provision. A mother not in her youth who knows fully how fleeting and so eternal are all the days of her children.
I love the details of this plaster carving - worn shoes, the sagging of an empty breast, the contentment of a well fed baby looking at his mother’s face with a sweet smile of contentment. I memorize her face, imagine her thoughts, feel her relief at sitting amidst her daily work to nurse her child.
I ride the train home. The miles are slow and I savor my last moments of solitude before I dive headlong back into my own motherhood. Years later and now with a sixth son, the days still rush by. I react instead of act and I remind myself of Mrs. Morse and her column of motherhood. I still occasionally find myself saying, “Wait, wait,” and expecting their time to stand still until my gaze finds them again. I so long to connect day with day the active presence and the setting aside practiced by A Woman of Boulogne.
I daily fail, but these artworks - my own triad of motherhood - have become residents of my imagination. And so even now in my falling short, I fall closer than before I knew these three women.

One Egg Cake
I have a lot of treasured family recipes that have been passed down to me from my Mom and my Nannie. My recipe box is filled with photocopied versions, typed versions, email versions, and my own notepad versions from those quick dinnertime phone calls. But I have very few original copies of their recipes - ones that they wrote out by hand.
The little blue piece of paper in this illustration is one of those treasures. If you would like to read the story of this Third Generation One Egg Cake recipe and see the illustration large scale just follow the link over to the They Draw and Cook website.

How To Be A Creative Mom When Life Is Full

AmberBoys
Creative Mom's Must Make Time To Create
My days are full and not unlike this picture. All that I do is filled up and punctuated by all that they do. I'll be honest I don't always appreciate it as much as I should. I have actually timed the interruptions - going three to five minutes without someone running up to ask a question or tell me something is quite a long stretch many days.
For many years my creative time has come in spurts - catch as catch can and finding the time to create has been a continual challenge. I knit sporadically and I sometimes sew. Those are rather easy when you have young children and don't have a studio or dedicated space to work. (No spare bedrooms in our home for a few years yet!)
[bctt tweet="For a creative mom the urge to create seems to be strongest when the daily work and responsibility is heaviest."]
But amidst the chaos, interruptions and daily work and responsibility that comes from caring for a large family the urge to be a creative mom never really leaves. Sometimes the cry is strong. Each time that siren call wailed in my ear I would think about the stacks of sketchbooks, drawings and illustrations that I had shoved in the back of the closet waiting for just the right time. Next year I turn forty and I have begun to understand - that perfect time - it will never really alive. So not too long ago I drug them all out and piled them all up. (There were so many more than I realized!)
As I watched all that evidence stack up in front of me I became convinced that I should just shove some things aside and make room. So I am just doing it. I am making time to be creative.
I try to make the most of many little moments during the day and work consistently in the evenings. I am learning to keep my focus, returning to the work at hand after the interruptions. I am striving to not be so sporadic but to develop a consistent habit of not only drawing but bringing my sketches and ideas to completion.
You can follow me on Instagram if you want to watch my progress.
How I'm Learning Online
Taking time to learn is just as important as taking time to be creative. Last year I began to refamiliarize myself with the Adobe software by subscribing to the Creative Cloud and using Lynda.com as my classroom - it's been a long time since college, ya'll! Thanks also to classes on SkillShare and CreativeBug I have learned how to take many of my sketches and ideas and turn them into repeat patterns. I have also learned how to combine Photoshop and Illustrator so that I can use my natural media drawings in surface design.
Creative Mom's Must Make Space To Create
I still do not have a dedicated space to create - I have taken over a small sewing table that is tucked in a dormer window in by bedroom and then work at our school table when I want to make a bigger mess. I have suffered only a couple of toddler 'accidents' which resulted in some pieces of 'shared work' and wasted ink. Through routine, conversation, and ensuring that they have space and materials for work of their own my space and materials (while still a curiosity) are now respected.
(Since writing this I carved out a larger space in my bedroom...check it out!)
What I'm Doing Right Now
Right now I am working now through that stack of sketchbooks and illustrations that I have accumulated over the years. My goal is to build a portfolio of my illustration and surface pattern designs here on this website. I'll be sharing my progress and process on this blog and more frequently on my Instagram feed.
I am also putting together some fun prompts for creative mom's who like me have struggled to find the time and space to play with a bit of color. Click Here To Read More If This Sounds Like You
Follow me on Instagram as I take this plunge!
Dive into a colorful adventure with me by using #imacolorfulmom to respond to my creative prompts.
Sometimes We Must Begin Again
All beginnings are hard. 'Be patient, David...All beginnings are hard. You cannot swallow all the world at one time.'I say it to myself today when I stand before a new class at the beginning of a school year or am about to start a new book or research paper: 'All beginnings are hard...Especially a beginning that you make by yourself. That's the hardest beginning of all.'Abbreviated excerpts from In The Beginning by Chaim Potok.
A New Blog
When I began blogging in 2006, blogging wasn't new but it still seemed fresh. There was something satisfying about creating a space, writing words, sharing pictures and having friends and family comment or reply. Grandparents loved it and I loved keeping up with my friends who were on this same homeschooling journey that I was on. It was encouraging to read their posts with my cup of tea first thing in the morning. It was so easy to share and the feedback was so positive that I began to share more and more of our lives on the blog. The boys were little and they were cute and the things they did were cute.
But as they got older and we became more 'connected' and people who we didn't know began to find their way to my blog there was this little part of me that cringed. That cringe grew over the years. I watched other bloggers make up cute names for their children to give them some anonymity but that felt awkward for me. My dear friend Beth of Ebenezer Stories and I began to have this conversation. As her children grew into adults and began leaving the nest she drew back from talking about them on her blog and even questioned having shared so much when they were children. Now she has grandchildren and she still shares on her blog but it is good to think seriously about these things.
When You Blog You Live Both In and Out of the Frame
At that same time bloggers began to have a conversation with their audience assuring them that they were sharing an edited version of their life. They "lived outside the frame" and things were messy and life was not as perfect as it seemed on the blog. I loved how some bloggers like Myquillyn Smith of The Nester and Ann Voskamp of A Holy Experience began to focus on the imperfectness of life. My friend Kelly Keller of Kelly's Musings started a series I love called Proof of Life which reveals all those crazy things that we are tempted to leave 'outside the frame'. Another blogger that I followed Tonya Peckover of Study In Brown pulled back entirely for a time and that was also right and good.
How Does Technology Affect the Privacy of Our Children?
Along came Picasa and its' uncanny face recognition ability. It was able to tell the difference between baby pictures of my boys when I often had to use environmental cues to do so. Then my pediatrician began to ask to scan their palms when we went in for annual exams and I just put the brakes on. I pulled a lot of pictures and some blog posts down which I felt were too personal. By that point I had already changed the kind of posts that I wrote, but honestly - I just wanted a do over. So I stopped posting all together and made my blog private. I knew that if I began to blog again that I would do it differently but I just wasn't sure what that meant.
I still don't have this all figured out. I will be bringing over some posts from my original blog to here. Some of them I will edit. My blog will focus more on my thoughts, my reading, things I make, and my design and illustration work. I now use Facebook for the kinds of posts and pictures that I used to blog about so that grandparents and family and friends feel connected. I probably still tend to overshare there but I often ask the boys if they mind - especially the older ones.
I use Instagram and do post pictures of the boys there. Without realizing it when I began to use Instagram I did not use the boy's names. That is an intentional choice now. I keep Twitter just for me - I share my silly thoughts and my thoughtful thoughts, sometimes about school, sometimes about family but nothing truly personal - especially about the boys. I want to post as things really are - a similar idea to Kelly's Proof of Life to show that life is not perfect but it is good. It is grace and mercy which carry us through - not our own goodness.
Life is Not Perfect But It is Good
So here in this space and moment I begin again.
Hoeing to the Middle

This photo is circa 1978 or so in the small family garden not the large communal fields
I was writing an email to a friend tonight and it triggered a memory...
I was just reminded of very hot sunny days hoeing the garden (mostly corn and tobacco). The particular memory was one in which Mom, Dad, my brother and I joined in with my Nannie and Papaw J and my Mom's brothers in some very large family fields in Stecoah, NC.
The first rows went so easily (especially since they were short rows in the corner of the garden). You could look back at that block and see something accomplished. But to look out towards all that lay ahead was dizzying. Hoeing those large fields was not always accomplished in a day, and we did only a row at a time each of us working along side the other. Sometimes those who got ahead (mostly Dad and my uncles) would finish their row and begin on one of our rows and work backwards to meet those of us who were slower so that we could all catch up for a moment and rest together before continuing on.
In this way it was not discouraging that someone was quicker and better at hoeing than you, but you were encouraged and kept going. May we work side by side and when one lags behind finish your own row and step over and hoe to the middle so that we may all stop and catch our breath and give thanks for what has been done and be encouraged to hoe on!
In Defense of Mom or A Busy Kitchen and a Cold Hearth
(slightly edited from my original blog)
After my previous post, I feel that I need to write a post in defense of Mom!
My frustration with the way I learned to ‘not’ clean the kitchen (by procrastinating) is just a part of my own struggle with procrastination. There certainly weren’t many times that I did it without being asked or told until I was much older – like when I came home from college and was happy to be in any kitchen at all (or when I felt guilty when Mom was sick or taking her finals)! Mom has told me a story several times that I treasure.
She was sitting in a chair with me on one knee and my brother on the other reading us a book when her Mom came to visit. Nannie J made a comment about it being nearly lunch time and the beds were all still unmade. Mom told her that her babies were growing every day, and that after they were grown there would be plenty of time to make the beds. I'm glad cleaning the kitchen wasn’t a top priority for her, but our life together changed when both my brother and I went to school and she went to work, then to college, and then began teaching.
I can remember many things from when I was very young and Mom was home with us - or we were home with her...
Some of them are my own memories, and some of them I remember from stories and pictures. It’s hard to explain the difference that happened when we went to school and she went to work,. It just seems it wasn’t so much a life centered around our home and land as it was when I was very young – and maybe my world just got bigger… When I was actually ‘learning’ to keep house by doing it (or not - by procrastinating as I was saying before) it’s was in a family that all went to school and work and came home. Our house was empty all day long. That doesn’t sound too odd for people nowadays, but the following story will show you how different if feels.
In the winter our home was heated completely by wood heat, so the fire would need to be fed all day long. Dad would bank the fire at night and get up very early before anyone else did and stir it up before he did his chores, so in the morning the house was already getting warm. The first place I would go every morning was to stand or sit on the hearth. During the winters after Mom began working and my brother and I were in school (after we were old enough to get off the bus at our house rather than the sitters) we would come home to a very cold house.
I would open the door expecting to feel the warmth of the fire and there was nothing, it was just cold. That was when I realized that our house had been empty all day. Our house now is hardly ever empty – there’s almost always some combination of us here. My kitchen has to function different than Mom's did. The way I learned to function in a kitchen hasn’t been working for me. It has taken me 10 slow years to figure that out! Now I'm trying to dredge up those early memories of when we were very little and all home - how did the kitchen function then when it wasn't me in charge of getting it clean?! Mom, if you read this sometime you can help me out!
Support My Projects
If you like what you read and see here and are interested in supporting my work feel free to click the button below.
mud quilts project
Personal Instagram